
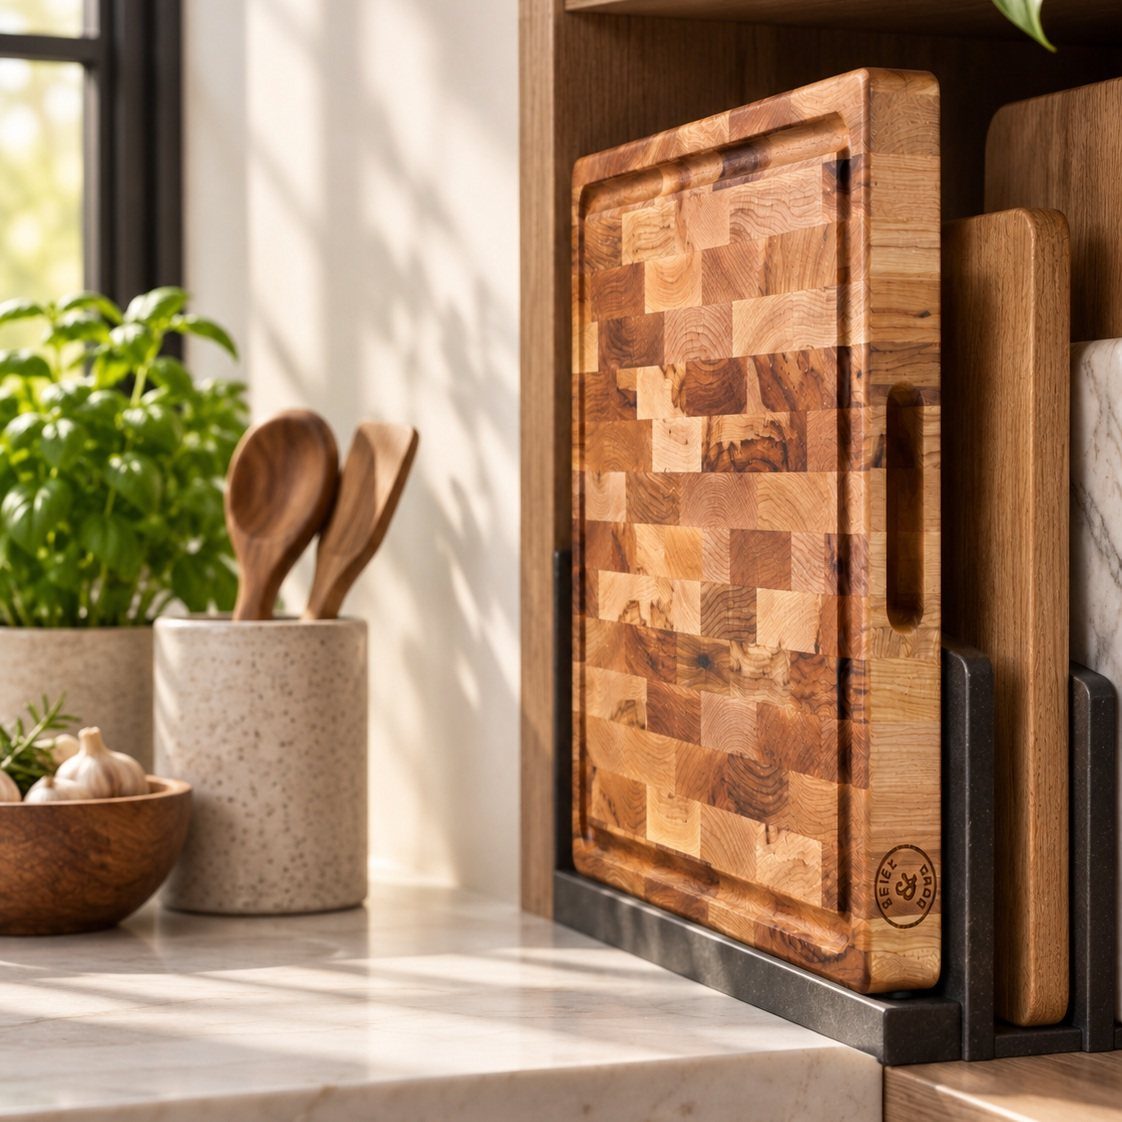
These chopping board storage ideas range from a magazine file on the counter to a custom workstation sink that only makes sense during a full renovation.
What decides which one belongs in your kitchen is whether you are working with existing cabinets or starting fresh.
1. Countertop Storage
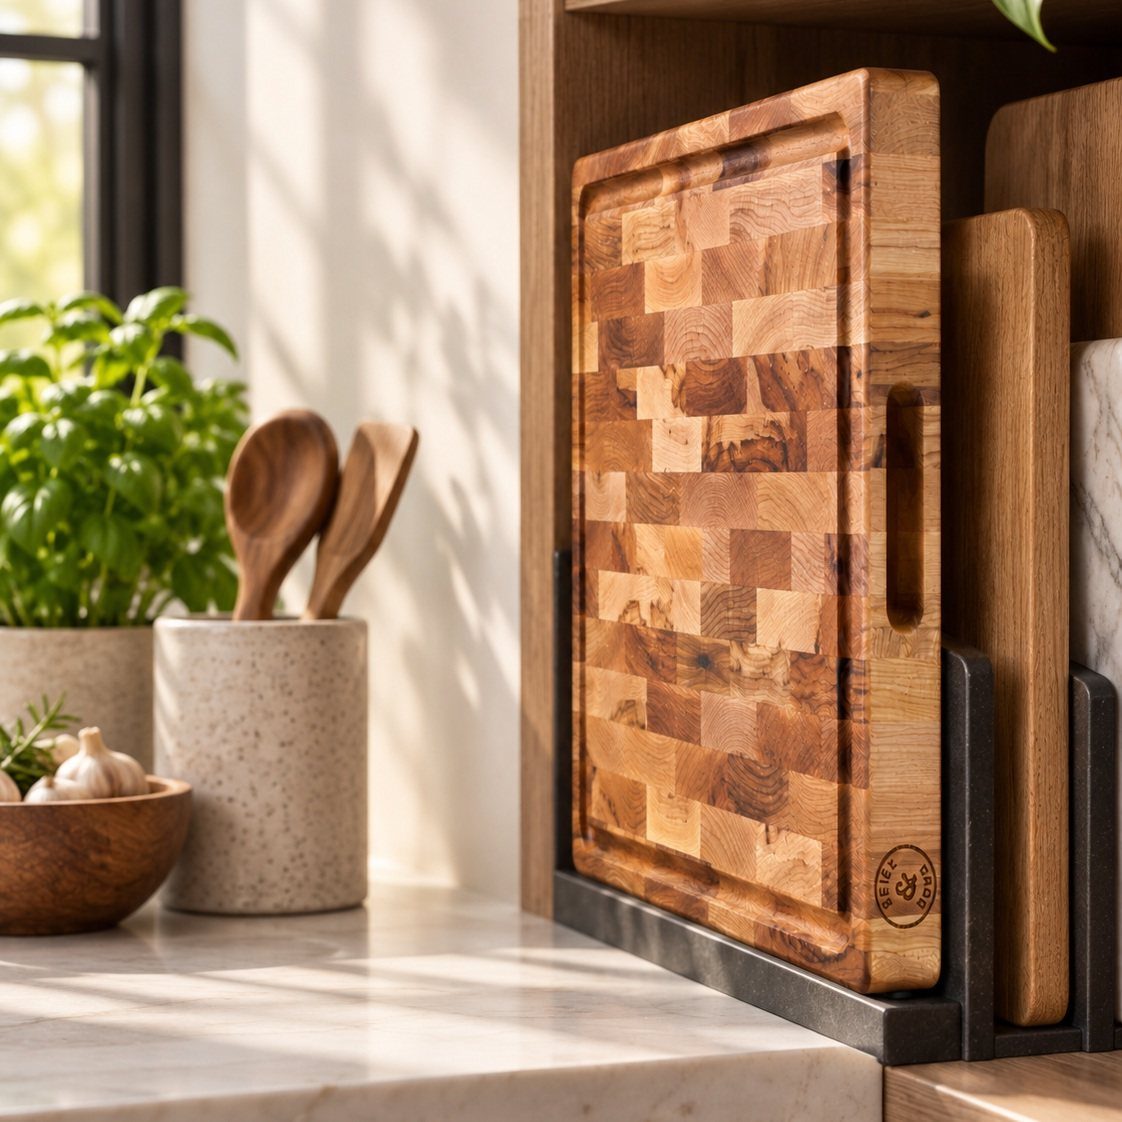
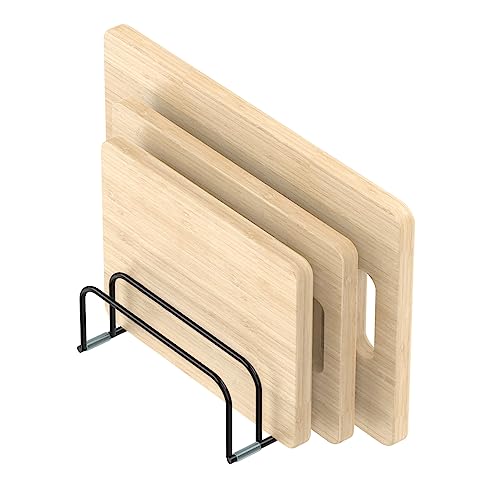
A metal rack on the counter keeps boards upright and within arm’s reach while you cook.
I like this setup for small kitchens where cabinet space is already tight, though it does eat up counter space you might need for prep.
Before buying, measure the thickness of your boards; slots that are too narrow warp the wood over time, and slots too wide let boards lean and scratch each other.
A black finish hides water spots better than raw steel, which I would pick for a busy kitchen.
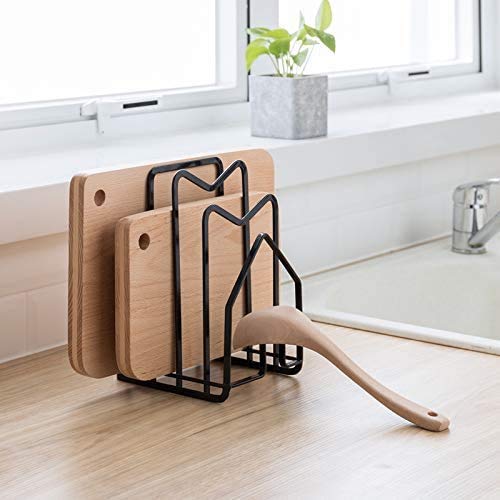
COMPACT While CONVENIENT: our cookware organizer rack measures 4.92 x 5.7 x 8.47 in., EACH DIVIDE is 1.18 in. WIDE. This cutting board holder can accommodate cutting boards sized up to 0.85-1.1 inches width and keep them at your fingertips.
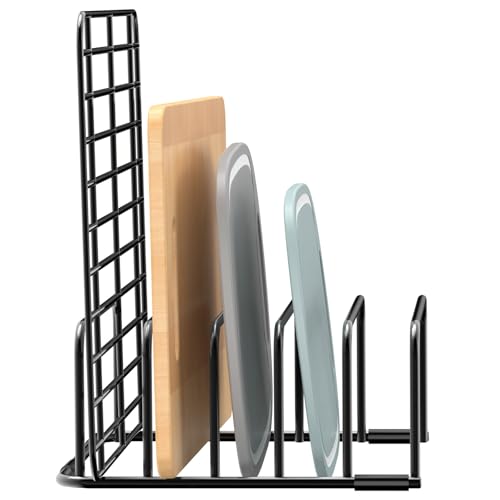
Suitable for Different Cutting Boards: The Fikoksol cutting board storage rack has 5 storage slots. This product was updated in April 2025. The new model measures 7.87 x 7.24 x 3.28 inches, with each slot being 1.2 inches wide. Please note that this storage rack is not suitable for thick kitchen utensils that are thicker than 1.20 inches, such as pots and deep bakewares. Please confirm the product size before purchasing
【Plate Organizer for Kitchen】Very sturdy to hold plate/cutting board/ pot lid etc.The size is convenient for a compact kitchen, small counter space.
2. Boards Hanging from Hooks
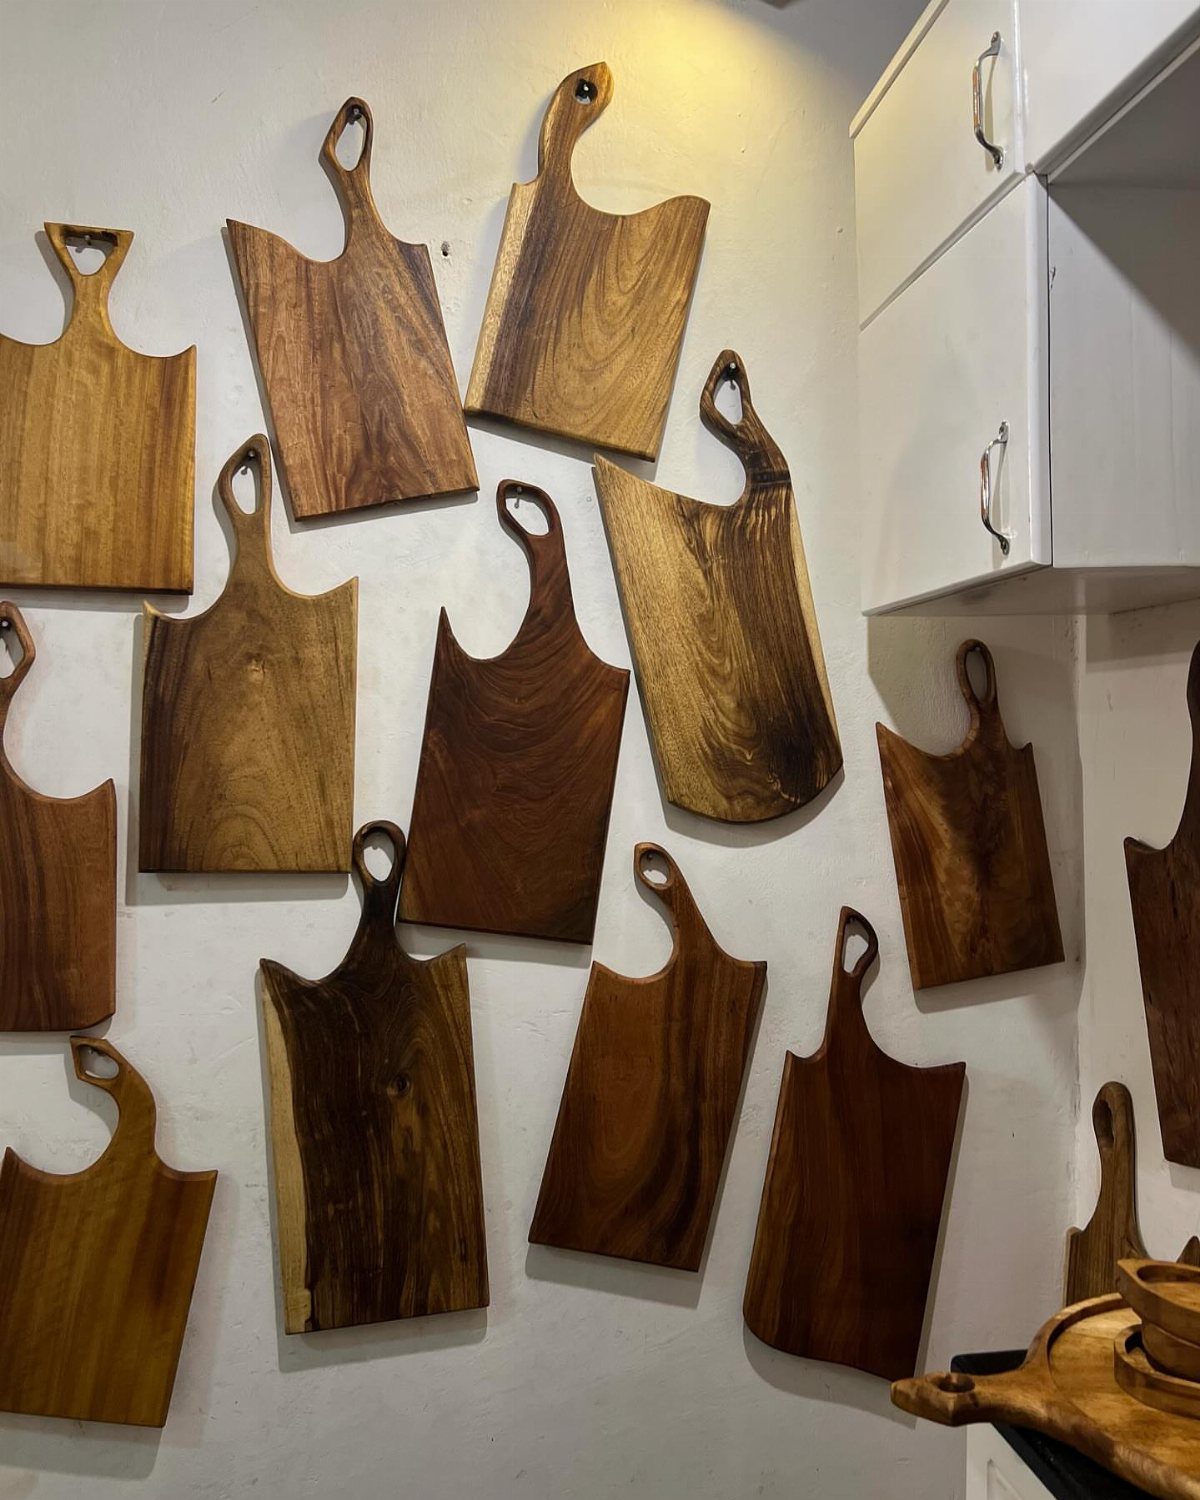
Small wall hooks turn cutting boards into something you actually want to look at. I would hang them on the backsplash side of a galley kitchen, where they stay off the work path but stay grabable.
Cutout handles make hanging simple; boards without them need a rail or ledge to rest on, and I have seen shallow ledges fail when someone leans too much weight on the front edge.
Check that your wall can take the load: drywall anchors for heavier boards, or screw straight into stud if you are hanging more than two.

Package Include: You will get 2 set cutting board holder with 4pcs double sided adhesive in total, the color is gunmetal, the size is about 30x51x74mm, enough quantity provide you more choices and can meet you different needs, you can share with your family member and friends

Frees up your Kitchen space: Get your pot lids or cutting boards off your countertop or out of your pantry and cabinet, and into the air where you can access them easily. Kitidy cutting board rack can also be mounted on the cabinet door to organize your pot lids, pans, or cutting boards as you desire.

Space-Saving Convenience: Transform your kitchen storage with the under cabinet cutting board holder. This set of 4 stainless steel racks helps you utilize your under-cabinet space efficiently. No more cluttered countertops or messy drawers – organize your cutting boards and kitchen tools effortlessly. The adhesive-backed racks are easy to install and remove, providing a convenient solution to keep your kitchen neat and tidy
3. Pullout Drawers
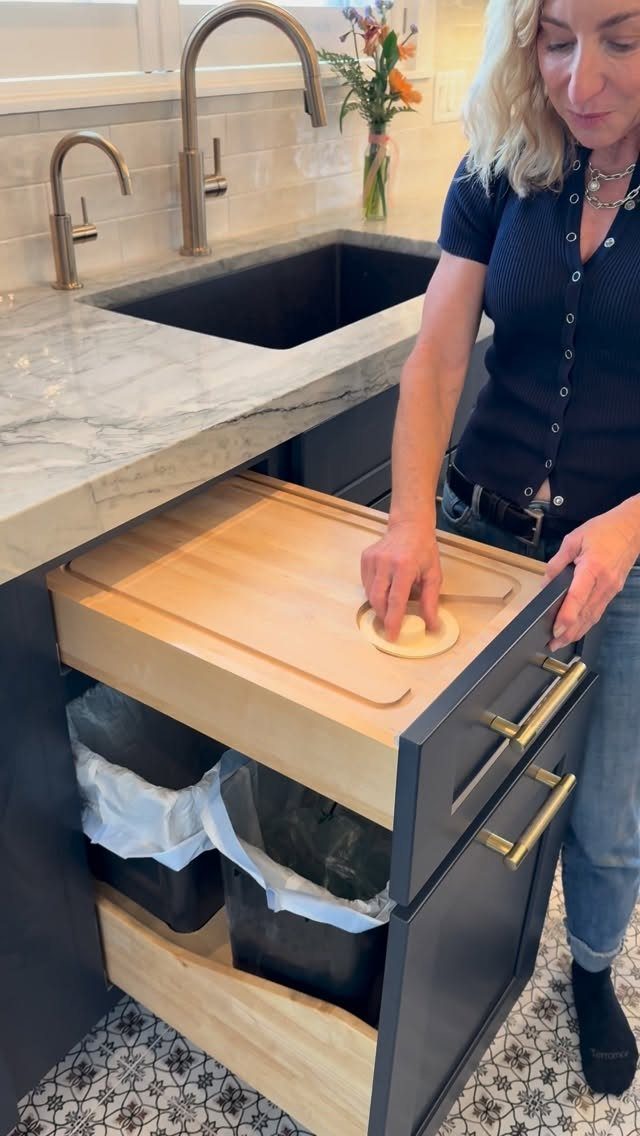
A pullout drawer with a built-in board and a hole cut over trash bins turns prep into a single motion: chop, sweep, done.
I would only build this into a base cabinet you already plan to remodel, since the cutout and the bin supports need precise fitting.
The same pullout logic works with a retrofit kit if your cabinet is deep enough to spare the space. Without that depth, the bins sit too shallow and tip when you scrape.

IDEAL CUTTING BOARD ORGANIZER: A must have food prep tool for your kitchen uniquely designed to organize your cut veggies and meat on the go. Makes cooking and prep an enjoyable and mess-free experience.

【Check Your Dimension】Our cabinet pull out shelves fit standard sizes. To ensure a perfect fit and a smooth installation process, please verify that your cabinet's interior dimensions are compatible with our product. This crucial step helps avoid potential issues and saves you valuable time and effort.
【Compact Design】This cutting board rack is quite compact, only 3 inch in height and 5.3 inch in depth, can be put in any corner in your kitchen.
4. Magazine Holders
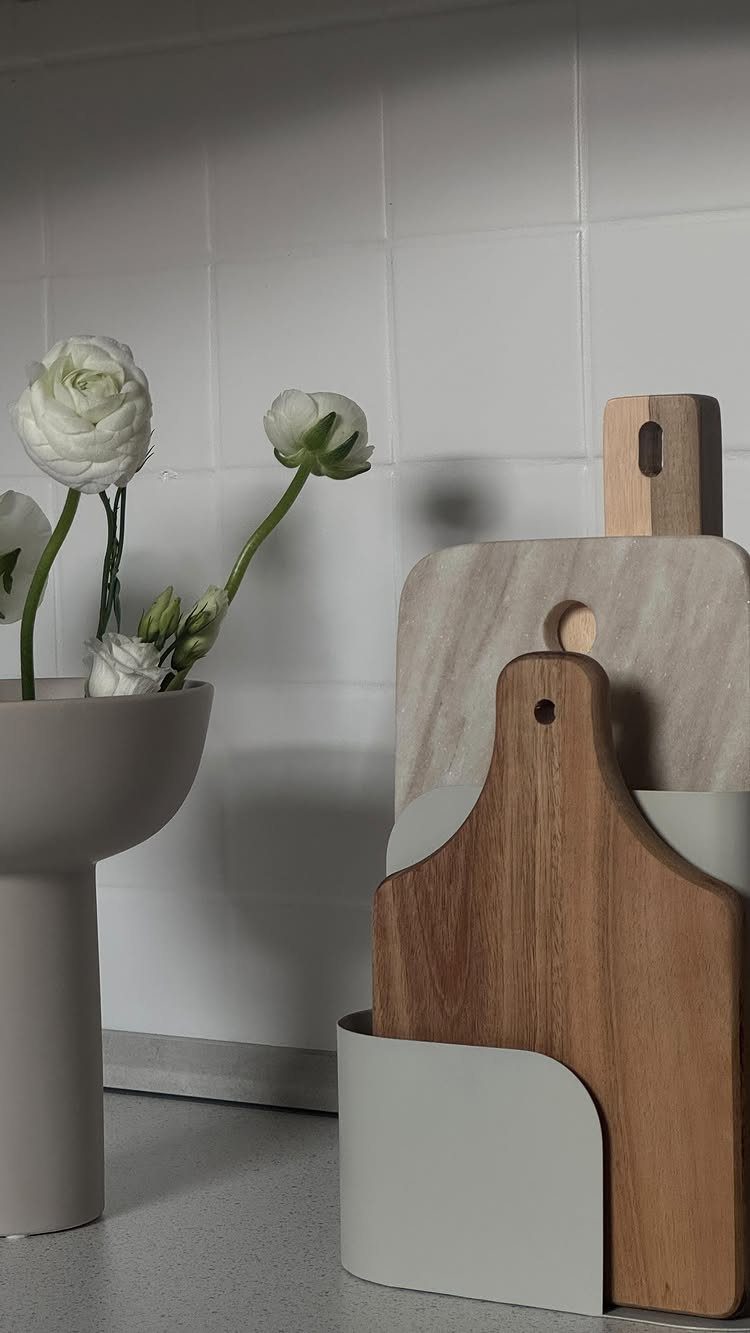
A magazine file on the counter corrals boards without looking like kitchen gear. Pale metal blends into a light backsplash, which I prefer to plastic versions that read office-supply aisle.
Check the file height against your tallest board; anything sticking up catches splatter and looks messy. I would set this near the prep zone but not right next to the stove, where heat warps wood over time.

Magazine rack (2-pack) keeps magazines standing neatly upright for space-saving storage

Disassembled and adjustable TOPCJ file folders sorter,wire caddy,chopping board organizer,multifunctional holder.

[ORGANIZE FILES, MAGAZINES AND MAIL IN ONE PLACE] This desk file organizer features 5 vertical compartments for sorting magazines, folders, documents, notebooks, class handouts and mails, helping keep your workspace or classroom neat and important items easy to find.
5. DIY Cutting Board Holder

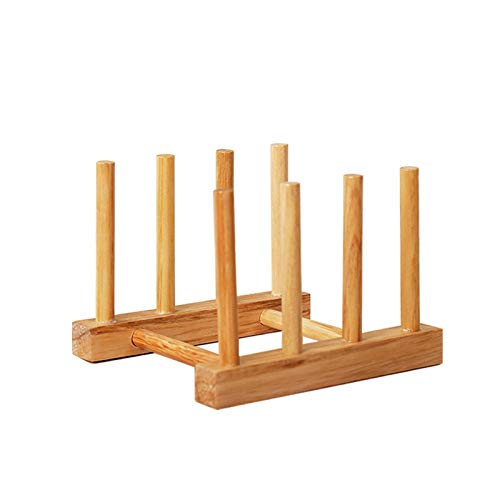
A slotted wooden holder built from scrap is the project I would pick if I had a table saw and an afternoon.
The slots need a little extra width beyond your thickest board to slide easy without rattling; I would cut enough slots for a household that keeps separate boards for meat, vegetables, and bread.
A countertop version works, but the same frame with a back panel and 2 keyhole hangers mounts to the wall. Sand smooth and use a food-safe oil, not polyurethane, on any surface that touches the board edges.

[ Premium Material ] --- Crafted from high-quality natural solid walnut wood, this kitchen organizer features a smooth, polished surface with exquisite wood grain, bringing a premium, warm aesthetic to your countertop. Solid walnut is naturally moisture-resistant, scratch-proof, and built to last for years, maintaining its elegant finish even with daily use.

Cutting Board Holder: This cutting board organizer is made of beautifully crafted acacia wood, perfect for displaying and storing cutting boards
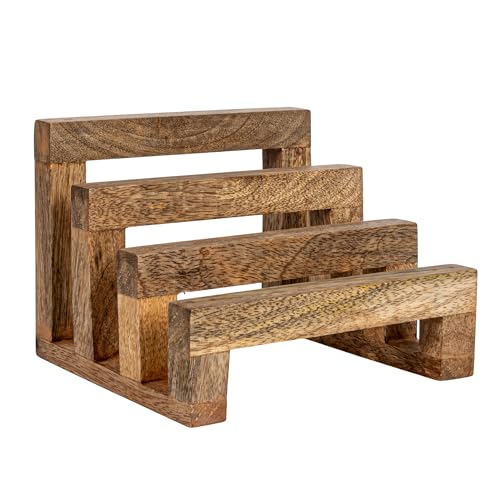
Beautifully crafted mango wood stand features three sections, providing a stylish and organized display for cutting boards
6. Integrated Cutting Board
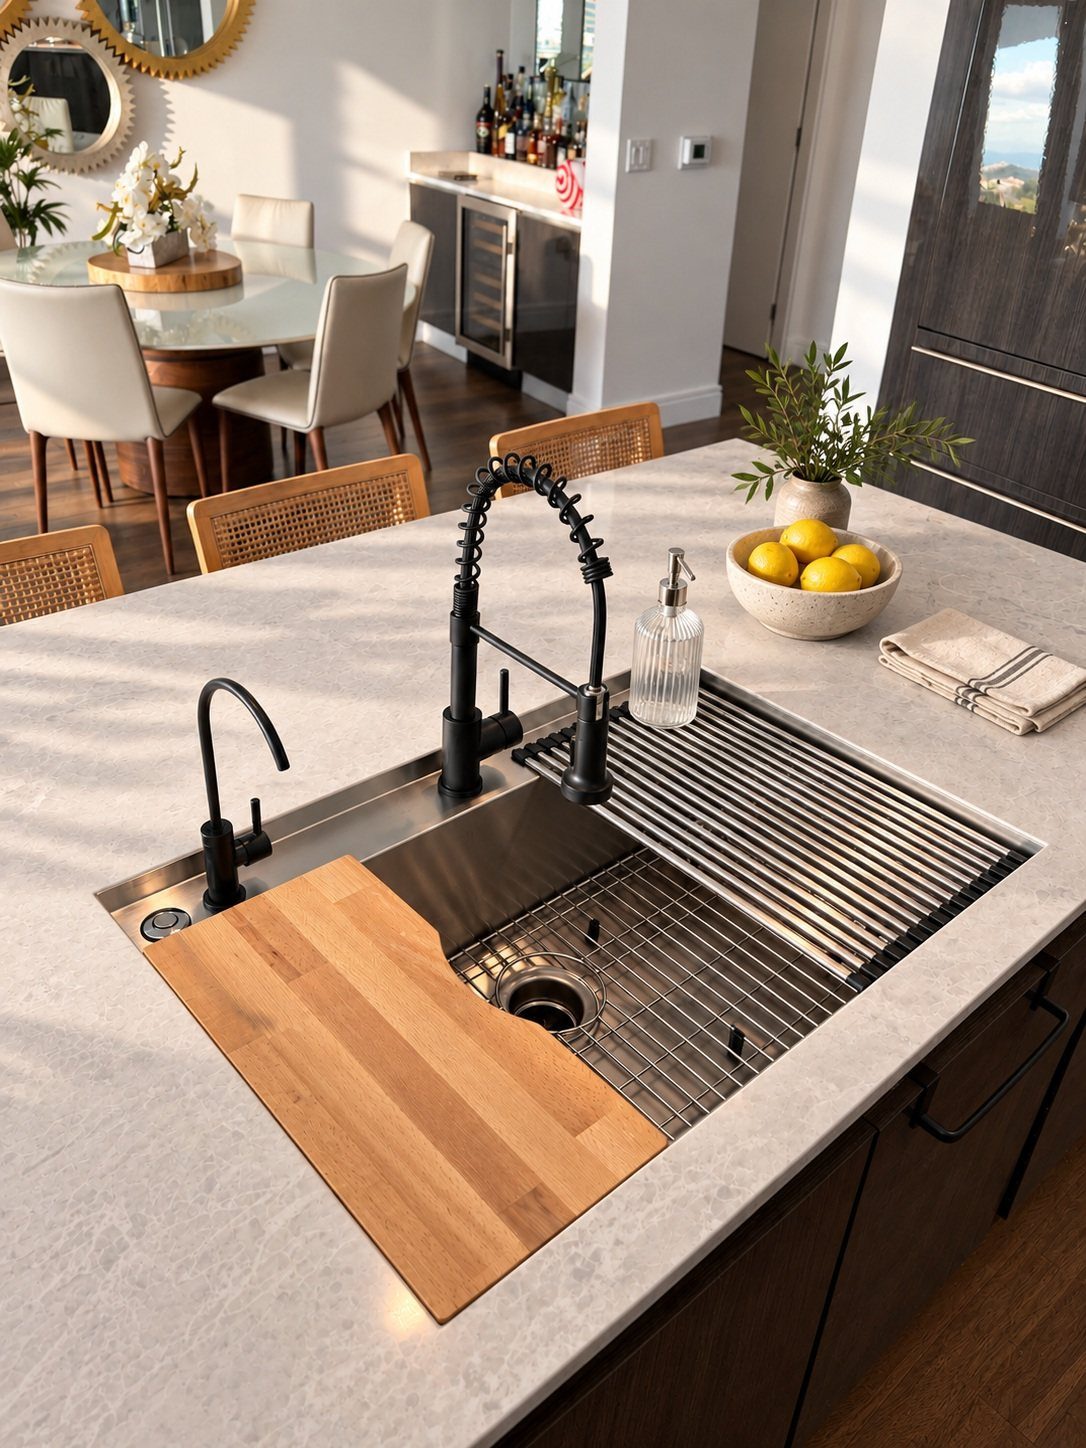
An undermount sink with a custom board that sits flush to the counter rim gives you a continuous prep surface and a direct route to the drain.
I would spec this only for a kitchen renovation, not a retrofit; the board has to match the sink’s exact width and the rim height, and most stock sinks are not built for it.
A workstation sink with accessories costs more than a standard basin but replaces a colander and a dish rack too.
If your sink is already in, a bridge board across the front is the cheaper compromise, though it shifts when you lean on it.

🎁【Suitable for Different Cutting Boards】 -- The Fikoksol cutting board storage rack has 5 storage slots. This product was updated in April 2025. The new model measures 7.87 x 7.24 x 3.28 inches, with each slot being 1.2 inches wide. ❗❗❗But please note that this storage rack is not suitable for thick kitchen utensils that are thicker than 1.20 inches, such as pots and deep bakewares.Please confirm the product size before purchasing.

【Super Slim Size】This cutting board organizer is super slim, only 4.3 inch wide and 5.6 inch deep, very handy to put it on countertop and in cabinet to store cutting boards, helps save valuable countertop space in your kitchen, makes countertop neat and clean.

BOMANSI BOMS Cutting Board Holder Stand: Crafted from stainless steel cutting board hold-grade 304 material with anti-rust coating. This chopping board holder maintains a polished appearance while storing up to 15 lbs of boards/lids, blending durability with modern kitchen aesthetics.
7. Open Shelving Display
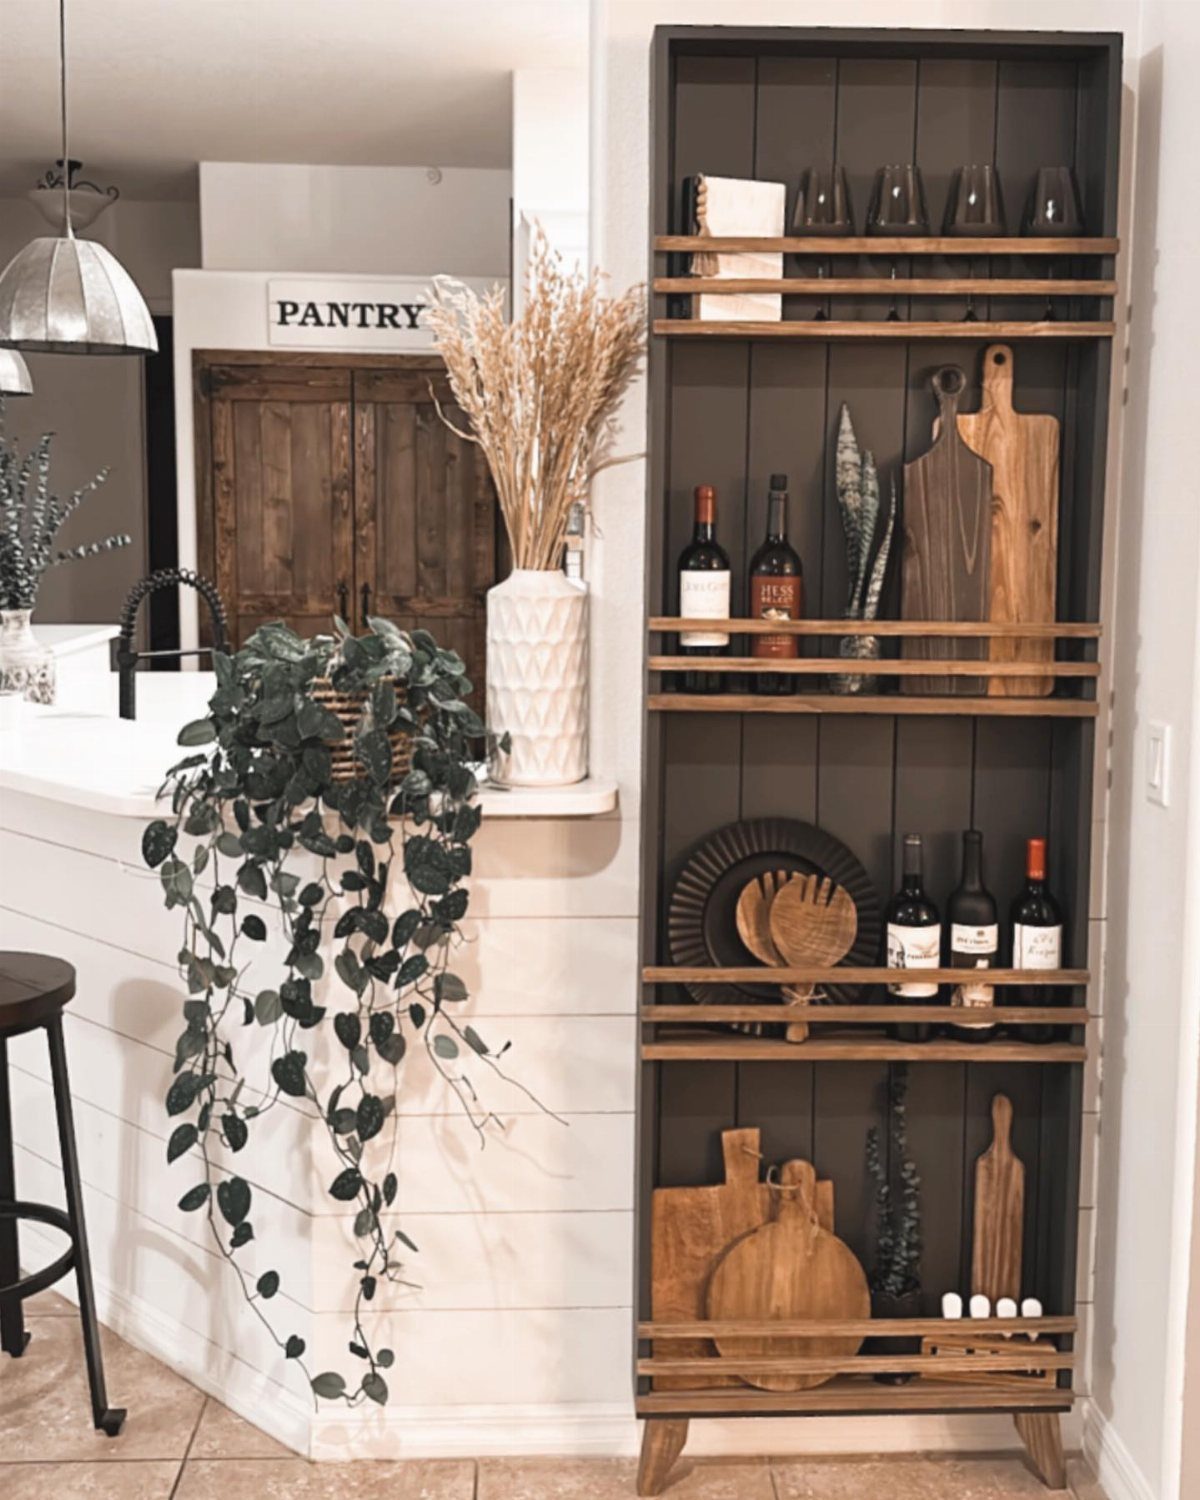
Open shelving turns cutting boards into part of the kitchen’s furniture, not hidden gear.
I would stand boards upright between bookends or taller items so they do not topple when someone walks past. Dark wood shelves suit warm-toned boards; painted shelves need occasional wiping since grease settles on open surfaces faster than inside cabinets.
Every item collects dust, and boards near cooking zones pick up a film of oil. I keep only the prettiest boards out here, the ones I would not mind guests noticing, and store the stained workhorses elsewhere.

Sturdy and Stainless Steel Construction: The wall hooks are thick and tough. The hooks material thickness is 3 mm The stainless steel construction ensures durability and makes the hooks very study and reliable for hanging various kinds of miscellaneous househould items. The stainless hook can hold objects securely and keeping the items from slipping off with the sleek design.

Multi-item Compatible Storage: Can hang woks, pot lids, cutting boards, and chopping boards, allowing large kitchen utensils to be mounted on the wall. There is a hook that can hang small objects. Inside cabinet holder organizers, Save more space.

Slimline storage case ideal for mounting in narrow spaces
8. Cabinet with Vertical Dividers
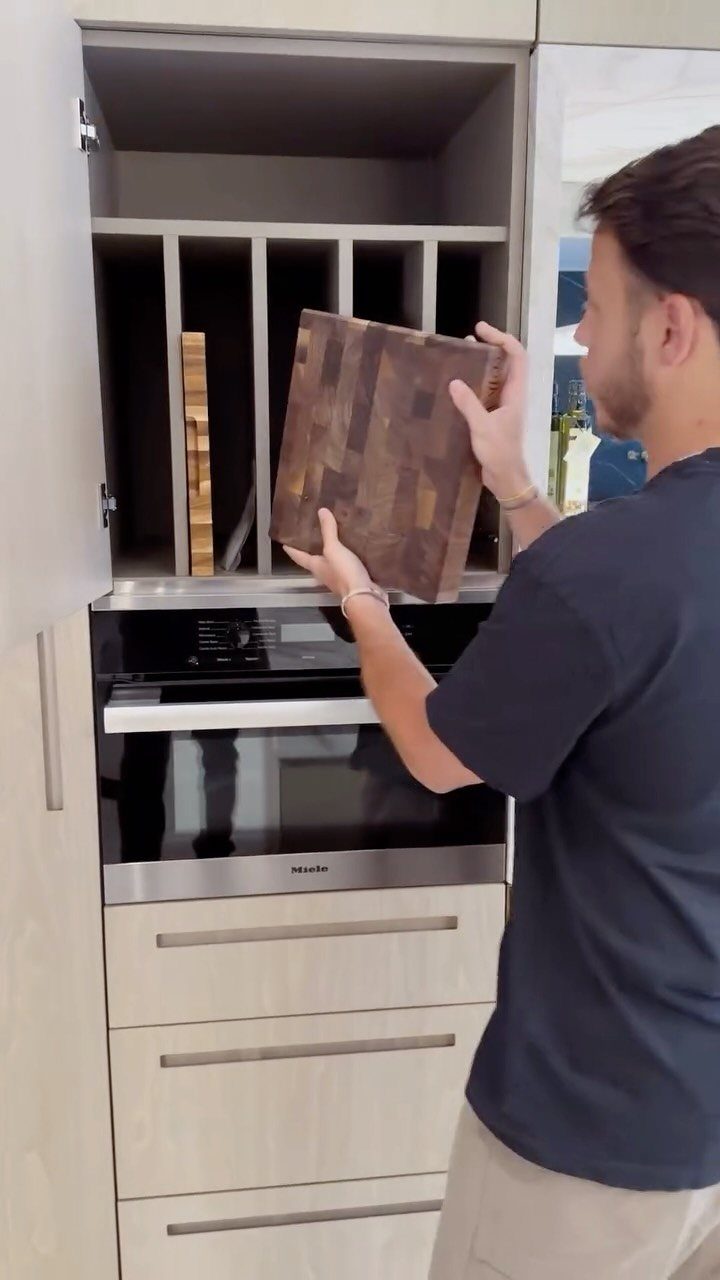
Vertical dividers inside an upper cabinet keep boards separated and easy to pull without the stack-toppling problem.
The spacing matters more than the material; I would leave at least half an inch on each side of the thickest board, or the fit gets tight after seasonal humidity swells the wood.
The cabinet above a built-in oven uses space that is often awkward for plates anyway.
I would check that the shelf height still clears your tallest board when the cabinet door swings; a board that nicks the door edge gets chipped fast.

VERSATILE DESIGN: This rack is designed to hold and organize different kinds of kitchen stuff, can be used to organize cutting boards, bakeware, cookie sheets,baking pans. It can be also used in your home office to organize office items.

【Durable Stainless Steel】 Crafted from heavy duty stainless steel with a sleek black coating that protects against rust, corrosion, and daily wear. The sturdy metal structure supports heavy loads, serving as a reliable under shelf storage basket alternative.
Best Storage Practices
Vertical storage matters most for wooden boards because trapped water underneath a flat-laid board warps the surface over time. After washing, I stand boards upright so air reaches both faces and water runs off instead of pooling underneath.
For daily-use boards that never sit wet, flat storage on a counter or in a drawer is fine; the risk is real but not urgent.
Seasonal humidity swells wood, so a slot that fits snug in winter may bind in summer. I would check the fit twice a year and shave a divider wider if needed.

MODERN, DURABLE DESIGN: Crafted from sturdy mesh steel, this desktop hanging file organizer is designed for everyday use while maintaining a clean, contemporary look that elevates your workspace

Easy to Access- With an open-top design, retrieving and organizing your documents is quick and hassle-free, making it easy to stay productive

NO DRILLING CHOICE - Using adhesive pad to install the single wall file holder will not damage wall surface, which is quickly and easily.
Cleaning and Maintenance
Clean boards with hot water and dish soap before every storage cycle. For deeper disinfection, douse the board with white vinegar, let it sit 5 minutes, then add baking soda and scrub the foam into the surface.
Rinse thoroughly and stand it to dry. Hydrogen peroxide works for a harder sterilization when a board has handled raw meat repeatedly.
Wooden boards last 4 to 7 years on average with basic care, and longer with regular oiling. Wood’s self-healing surface and natural antibacterial properties beat plastic for longevity, though both need replacement once deep grooves hold bacteria that scrubbing cannot reach.

Nice Quality: Made of nice-quality wood and metal, this cutting board organizer rack offers superior durability and stability compared to other materials.

【CUTTING BOARDS FOR KITCHEN】5-layer thickened cutting board set includes 3 chopping boards of various sizes: "XL" size is 17.0*12.0*1.0 inch, suitable for meat or steak, "L" size is: 14.0*10.0*1.0 inch, suitable for vegetables, "M" size is 10.0*7.1*0.8 inch, suitable for fruit. Various sizes of bamboo cutting boards can meet your regular cutting needs. And it's also can be used as a serving tray to entertain guests. Equipped with cutting board rack for easy storage cutting boards.

【Superior Acacia Wood Construction】 Made from high-quality acacia wood, this 3-piece cutting board set offers outstanding strength and longevity. The dense fiber structure of acacia resists cracking and wear, holding up to heavy daily use. Each board comes with attached silicone feet for slip-free chopping.
Space Optimization
End panels on islands and cabinet sides hide storage that does not clutter the main work path.
I would avoid any solution that puts boards flat inside a deep drawer while they are still damp; the stack topples when you pull the bottom one, and any trapped moisture has nowhere to go.
