
The cost range runs from a free pallet stand to a modular stack that adds up fast, and the one that fits your shop depends on whether you need the tool to come to the project or the project to stay put.
1. Pegboards
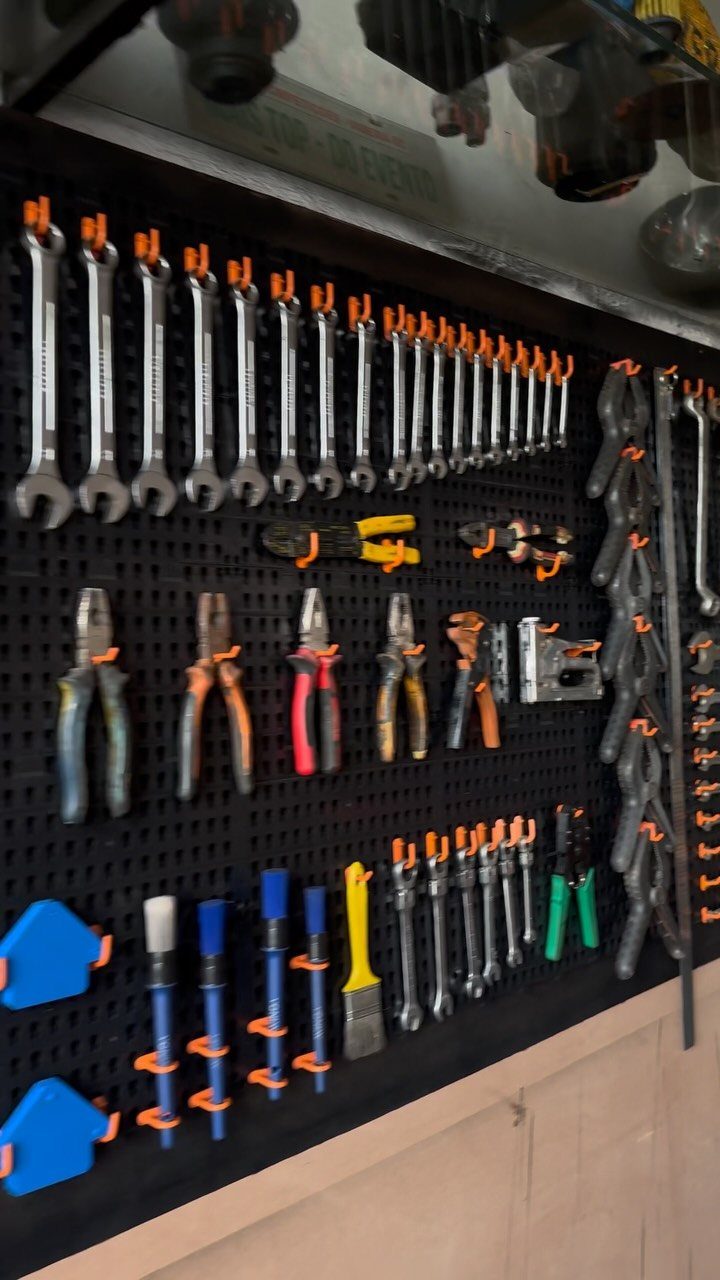
A pegboard turns any open wall into reachable storage for hand tools, which matters when floor space is tight and every project starts with finding the right wrench.
I like the slotted style over traditional pegboard because the hooks seat more securely; orange ones against black board make the outline of each tool obvious at a glance.
Check that your wall can take the load if you are storing heavier items like clamps or a staple gun, and leave breathing room between groups so the board does not turn into a puzzle you solve every time you need something.

More secure tool board hook engagement over conventional peg board pegs

Ample Quantity: comes with 52 pcs of metal hook assortment; The sufficient quantity allows you to decorate your tool wall as you like and can serve you for a long - term; Ideal for organizing tools in garage, kitchen, and home storage, meeting various daily storage needs; Note:our metal hook assortment Only for use with specific pegboard and slotted tool board

Value Package: Our pegboard tool organizer comes with 120pcs pegboard accessories,16 different type pegboard hooks including 5pcs pegboard bins, curved hooks, angled hooks, straight hooks, and ring tool holder, multi tool rack. 49pcs of them are peg locks for fixing hooks
2. Rolling Cart
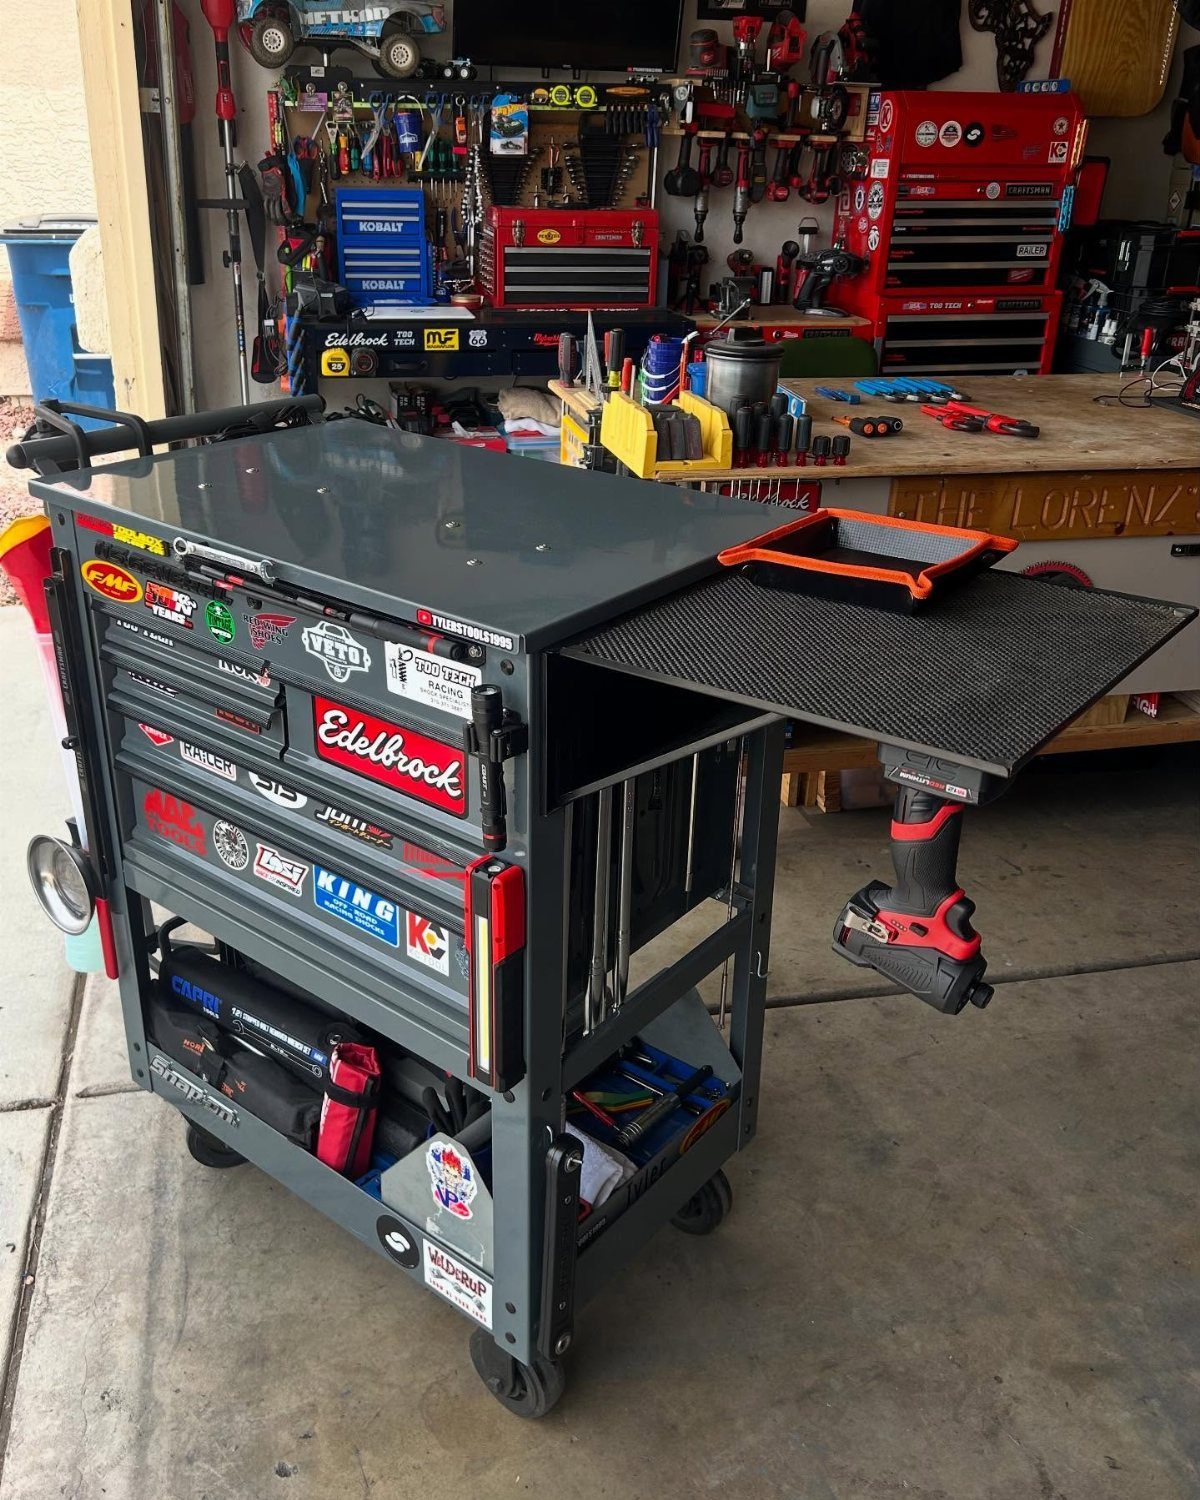
Rolling carts earn their spot in small garages by coming to the project instead of making you walk back and forth across a cramped floor.
The mechanic’s style with pull-out drawers and a side tray keeps power tools upright and ready, and the stickers are not just decoration; they mark what brand of socket set lives where after years of use.
I would look for one with locking casters, since a cart that drifts while you are routing is worse than no cart at all.
Footprint is the real issue, even when parked: measure your work aisle before you buy, because a cart that is too wide turns every project into choreography.

Large Capacity Storage: This 4-tier tool cart (32.7 x 13.8 x 32.5 inches) includes 3 large trays and a lockable drawer with smooth slides. Side pegboards with hooks keep tools organized, ideal for workshops and outdoor use.

【Strong & Durable】Pelnuies tool cart is made of high-hardness cold-rolled steel as the main material, with excellent strength and durability, able to withstand heavy loads and wear and tear brought about by daily use; the surface of the mechanic cart has been electrostatically sprayed with paint, so that the body is not easy to rust and damage.

Heavy-Duty Steel, Powder-Coated Finish: Built from cold-rolled steel with a smooth powder coating to resist dents, rust, and corrosion—ideal as a rolling tool chest for daily garage and workshop use.
3. Wall-Mounted Broom Holders
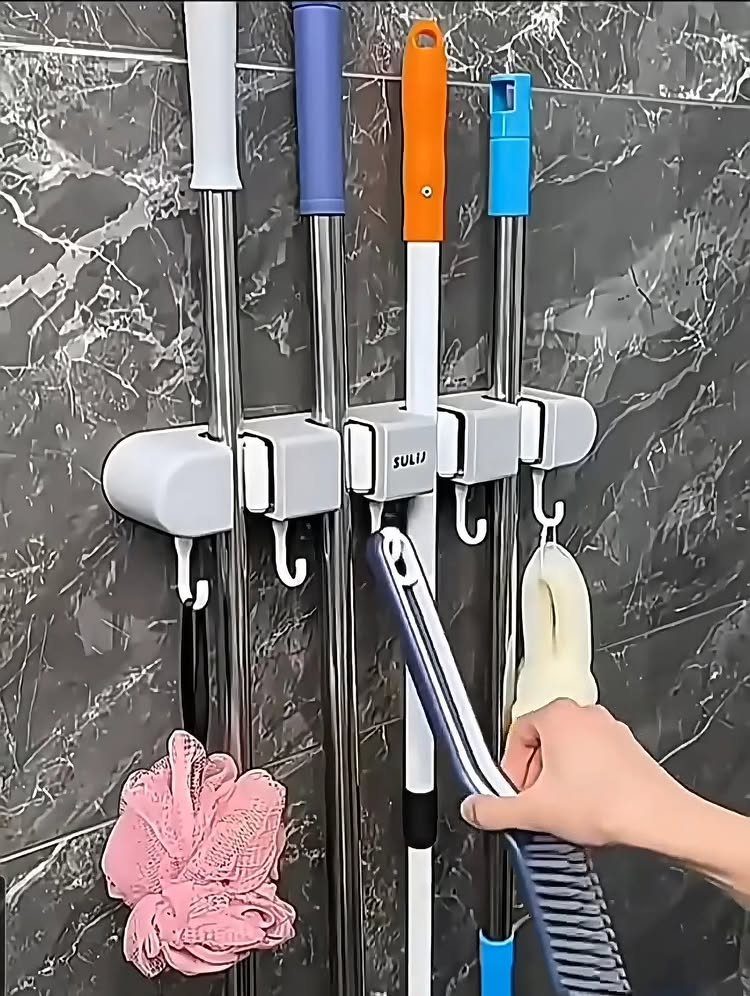
Wall-mounted broom holders keep long-handled tools off the floor and in a line where you can see what you have.
I would mount them at a height where the working end clears the floor by an inch or two, not dangling into a puddle or dust pile.
Check the depth of your handles against the grip opening before you commit to a brand; a thick wooden broom handle and a thin metal mop shaft need different holders, and mixing them on one rail wastes slots.

HEAVY DUTY GRIP THAT NEVER DROPS A TOOL — Every slot on this broom holder wall mount uses a spring-loaded, rubber-padded clip, so this mop and broom holder wall mount grips handles from 1/2" to 1 1/2" and holds up to 35 lbs per slot. Unlike flimsy broom clips for wall use, this broom mop holder wall mounted rack locks wet mops, rakes and long-handled tools in place with zero sliding — a mop holder wall mount heavy duty enough for home, garage and commercial use.
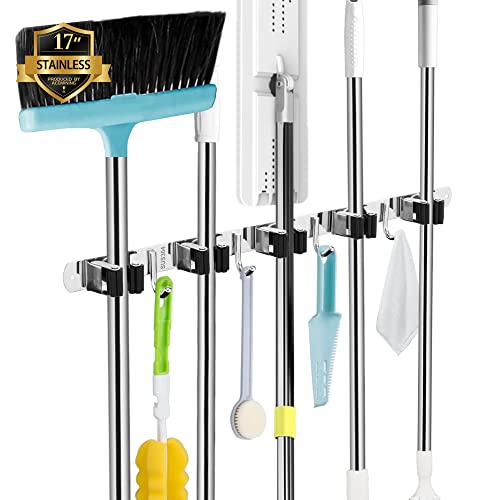
Strongest Hold & Non-slip Design: The broom and mop holder wall mount is made of rustproof 304 stainless steel, more durable than plastic materials, holds items up to 30 lbs when secured with screws (or 8 lbs if secured with self-adhesive). The broom hanger combines with anti-skid silicone, preventing scratches, slots are double rubber gripped to help keep a stronger hold on your items.
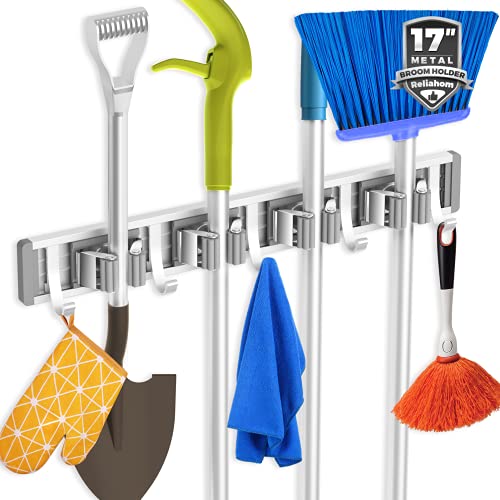
Multi-purpose Wall Mounted Storage Rack - Our Reliahom adjustable wall mounted rack is designed for holding mops, brooms and other cleaning tools. It works as a practical storage solution for home and outdoor organization.
4. French Cleats
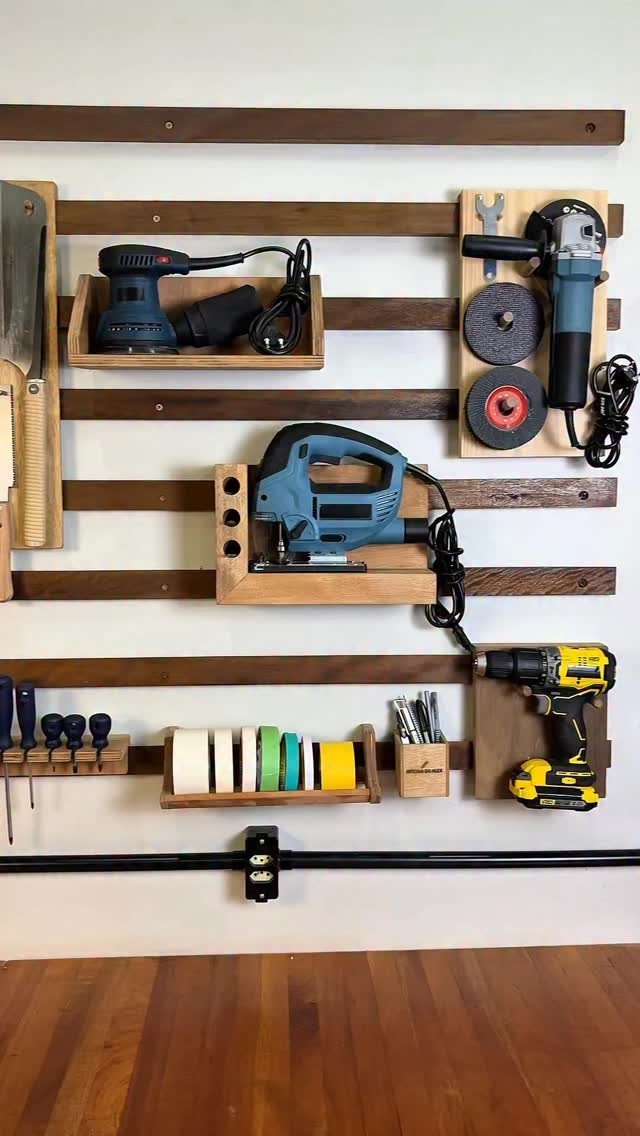
French cleats are the system I point to when someone wants wall storage that changes as their tools do.
A wooden slat mounted level across the wall accepts custom holders you build for each drill, sander, or tape roll, and you rearrange without new holes.
The visible setup above a workbench is where this shines; power tools live at arm’s reach, and the slat’s angle keeps them seated even when you bump the wall.
I would use hardwood for the wall strip and match the angle exactly on every holder, with a steeper angle for heavier loads.
The upfront time is real; this is not a Saturday morning install. You get a wall that grows with your collection instead of fighting it.

[𝐅𝐫𝐞𝐧𝐜𝐡 𝐜𝐥𝐞𝐚𝐭 𝐰𝐢𝐭𝐡 𝐕𝐞𝐫𝐬𝐚𝐭𝐢𝐥𝐞 𝐌𝐨𝐮𝐧𝐭𝐢𝐧𝐠 𝐎𝐩𝐭𝐢𝐨𝐧𝐬]: Our 6-inch French cleat hanger provides a flexible solution for various applications, from hanging art to whiteboards and cabinets.

[𝐅𝐫𝐞𝐧𝐜𝐡 𝐜𝐥𝐞𝐚𝐭 𝐰𝐢𝐭𝐡 𝐕𝐞𝐫𝐬𝐚𝐭𝐢𝐥𝐞 𝐌𝐨𝐮𝐧𝐭𝐢𝐧𝐠 𝐎𝐩𝐭𝐢𝐨𝐧𝐬]: Our 12 inch French cleat hanger provides a flexible solution for various applications, from hanging art to whiteboards and cabinets.

JAPANESE SAW STORAGE: Designed specifically to hold Japanese-style pull saws securely on your French cleat wall system.
5. Tool Chest with Drawers
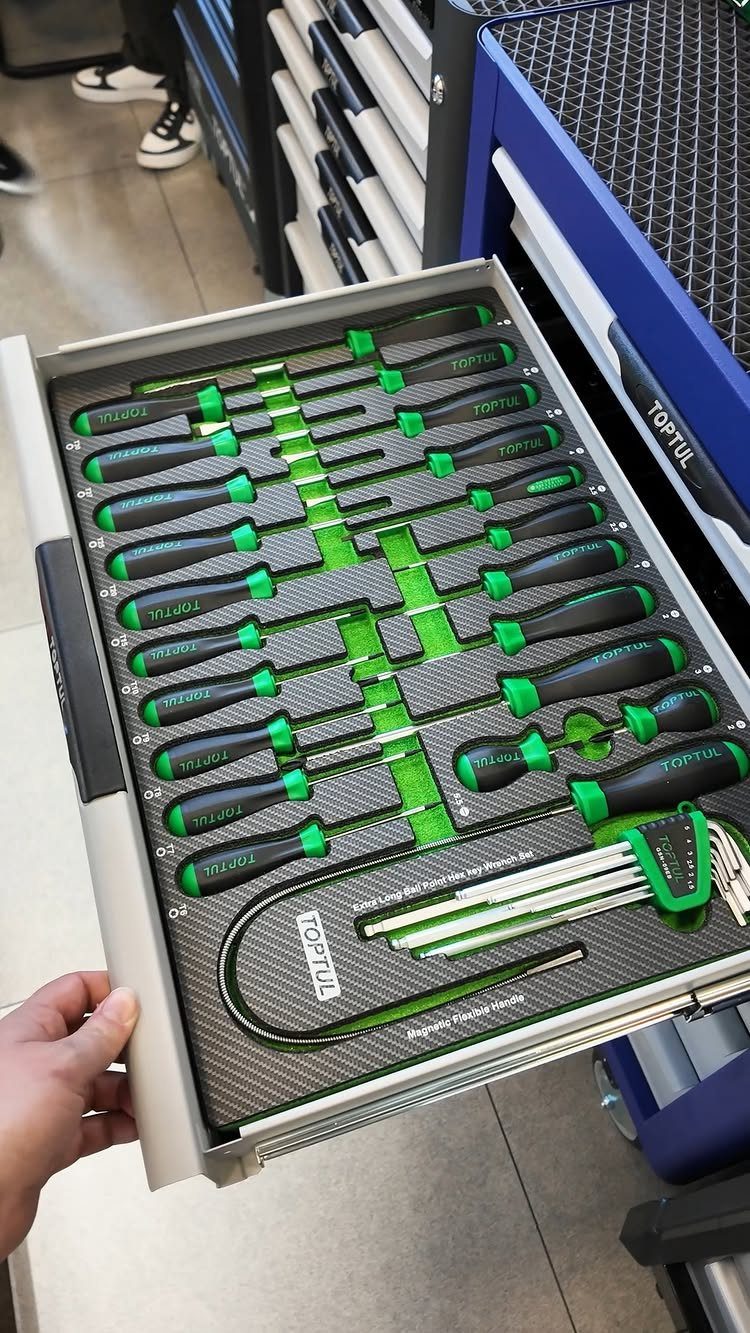
A tool chest with drawers brings order to small shops by stacking storage vertically and keeping dust off the contents.
The foam cutouts in the visible drawer are the detail that matters; each screwdriver, hex key, and magnetic tool has a shaped seat, so you know at a glance what is missing and what belongs where.
I would build or buy foam inserts only after living with the tools for a month, because the layout you imagine on day 1 never matches the order your hands reach for on day 30.
A chest protects and organizes, but it is slower than open wall storage for the tool you reach for constantly. I keep daily drivers on a pegboard and the rest in drawers.
The best way to fight clutter in your workshop is with intentional and functional organization. Shelves, pegboards, and cabinets keep your tools and supplies tidy, yet easily accessible.

IMPACT RESISTANT MATERIAL - Constructed from strong and durable polypropylene, this storage rack is difficult to damage or break. It is also rust proof and made to last.

All Metal Material: Our garden tool organizer, both backboard and hooks are made of iron, which makes it more durable and solid.And its load-bearing capacity far exceeds other usual ABS material tool hooks. It is deal for various tools like shovel, rakes, bikes, broom, mop, trust that what you get is what you see,any dissatisfaction please contact our customer service team

✅【GO LARGE, STAY SORTED】Tired of racks that work today but can’t keep up tomorrow? Meet Jaxon — This large power tool organizer wall mount made for DIY lovers who know their collection won’t stop here. Ample space, strong build — it's the last organizer you’ll need for a long time.
6. Fabric Organizers with Pockets
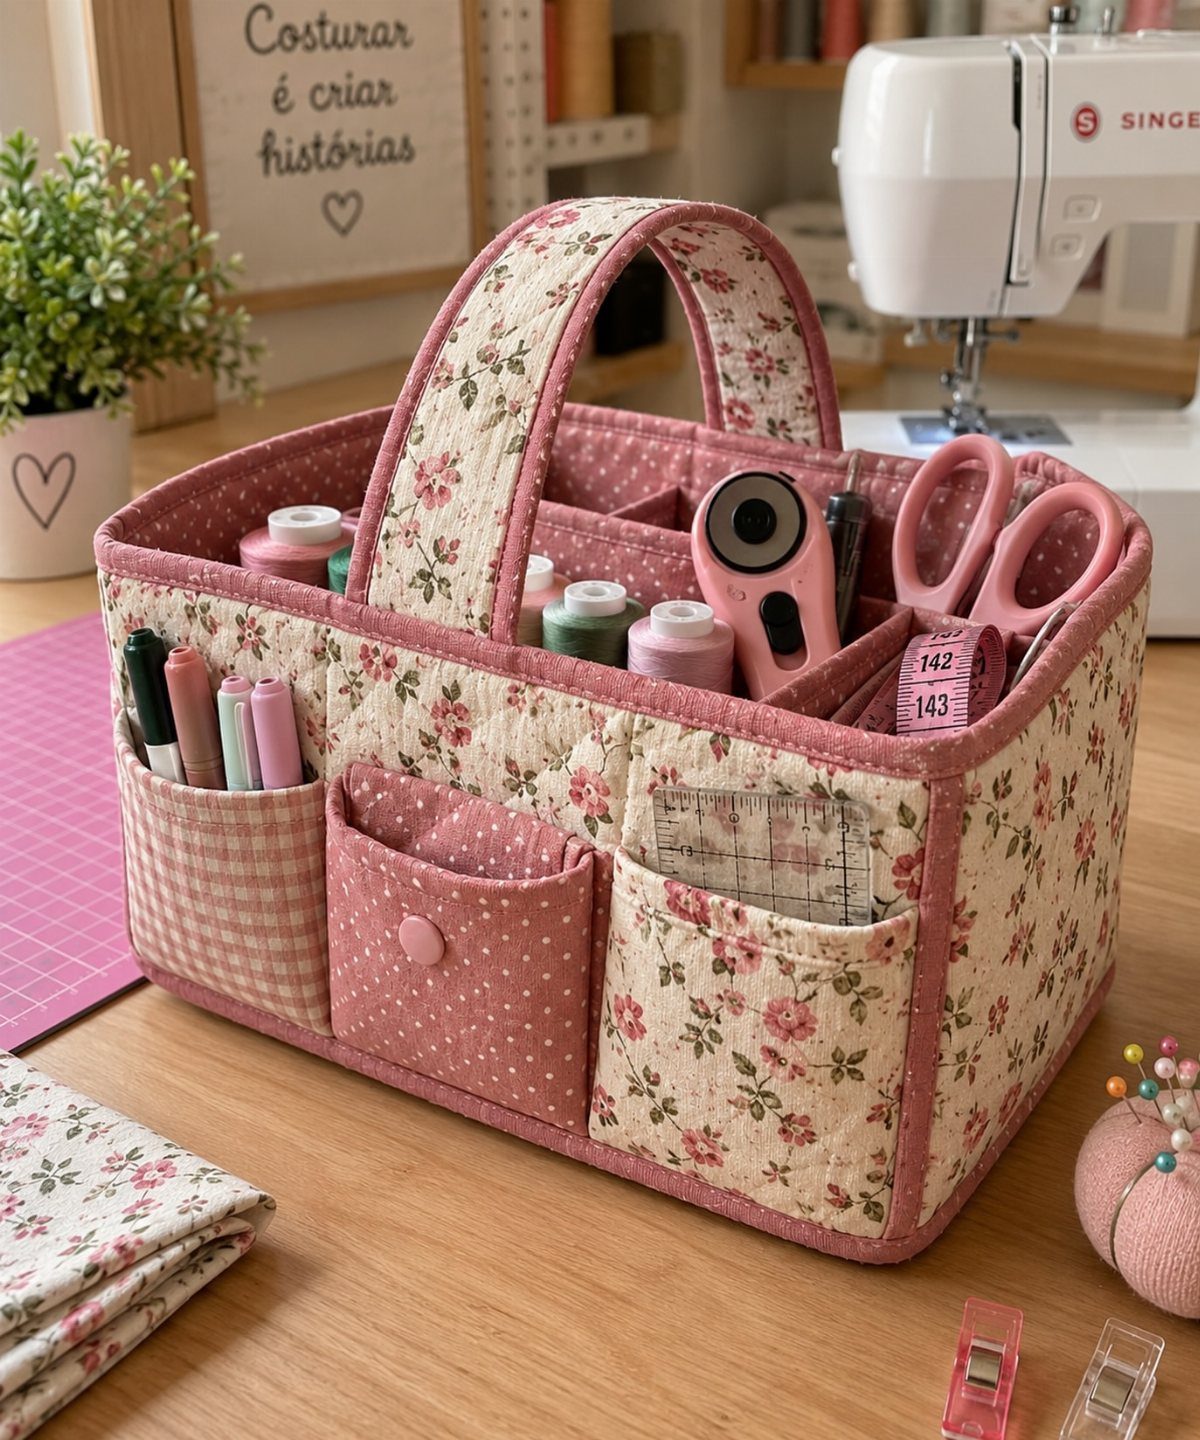
Fabric organizers with pockets suit the kind of small-space tool storage that lives on a shelf, in a closet, or carried to the dining table for a project that will not wait for shop time.
I would choose one with stiffened sides so it does not collapse when half empty, and pockets sized to the actual items, not the idealized versions on the package.
This is storage for the tool set that does not match the garage; sewing, jewelry, electronics repair, anything with small pieces that scatter.
Capacity is the limit; once the pockets fill, the caddy becomes a puzzle instead of a solution, so I keep a second empty one ready for overflow.

More secure tool board hook engagement over conventional peg board pegs

More secure tool board hook engagement over conventional peg board pegs

Built Exclusively for Wall Control Pegboards. Engineered only for Wall Control’s slotted metal tool boards, these hooks lock securely into place and will not work with traditional round-hole pegboard. Designed for a precision fit and maximum holding strength.
7. Wall-Mounted Power Tool Racks
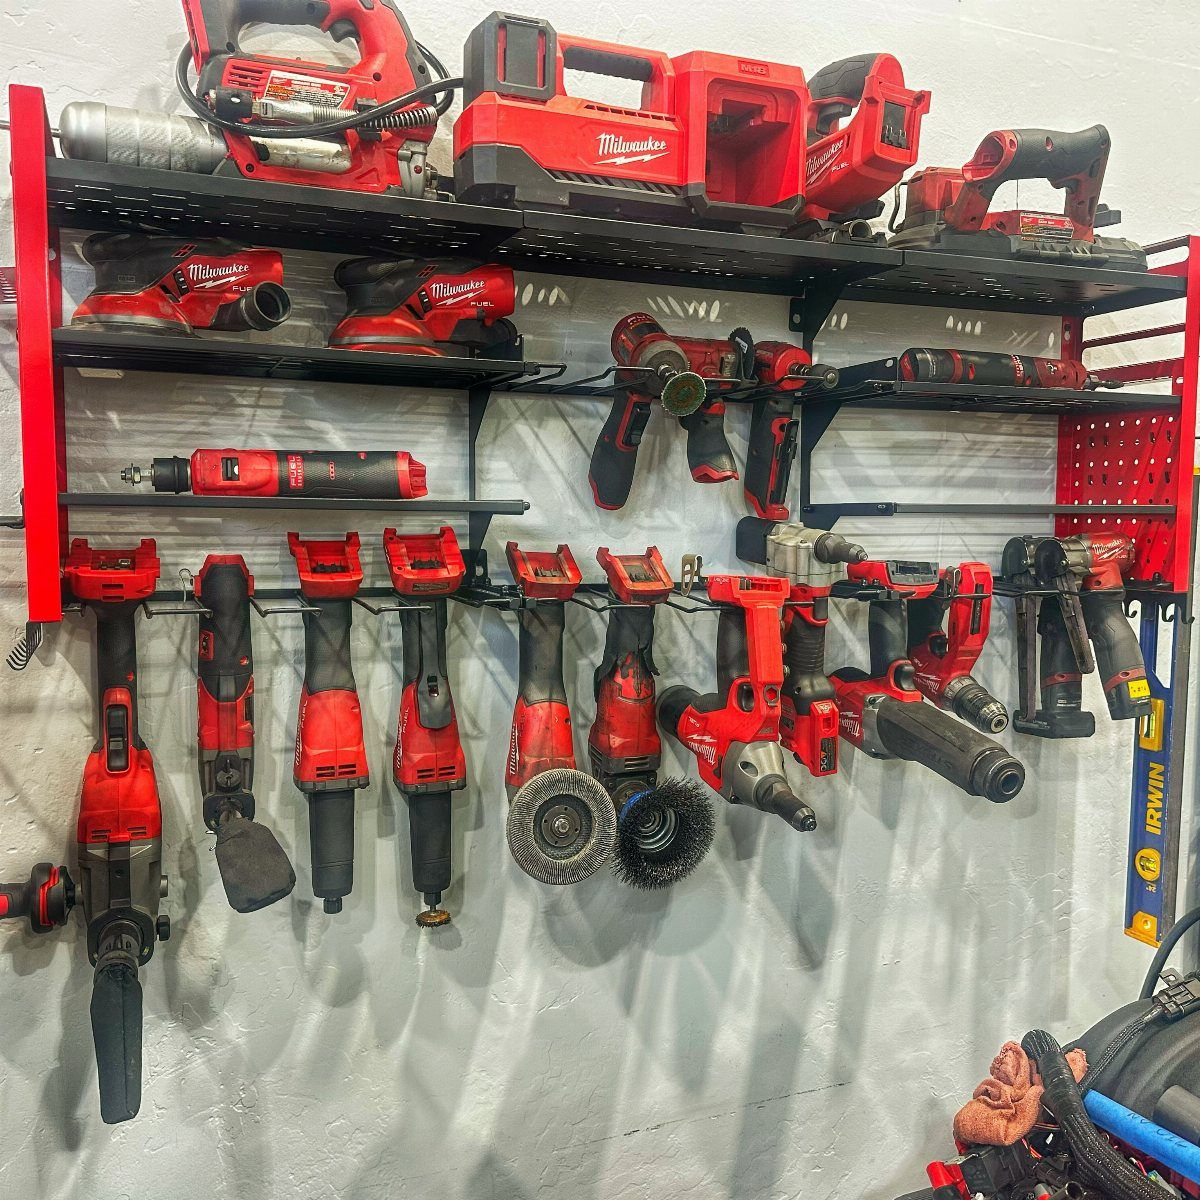
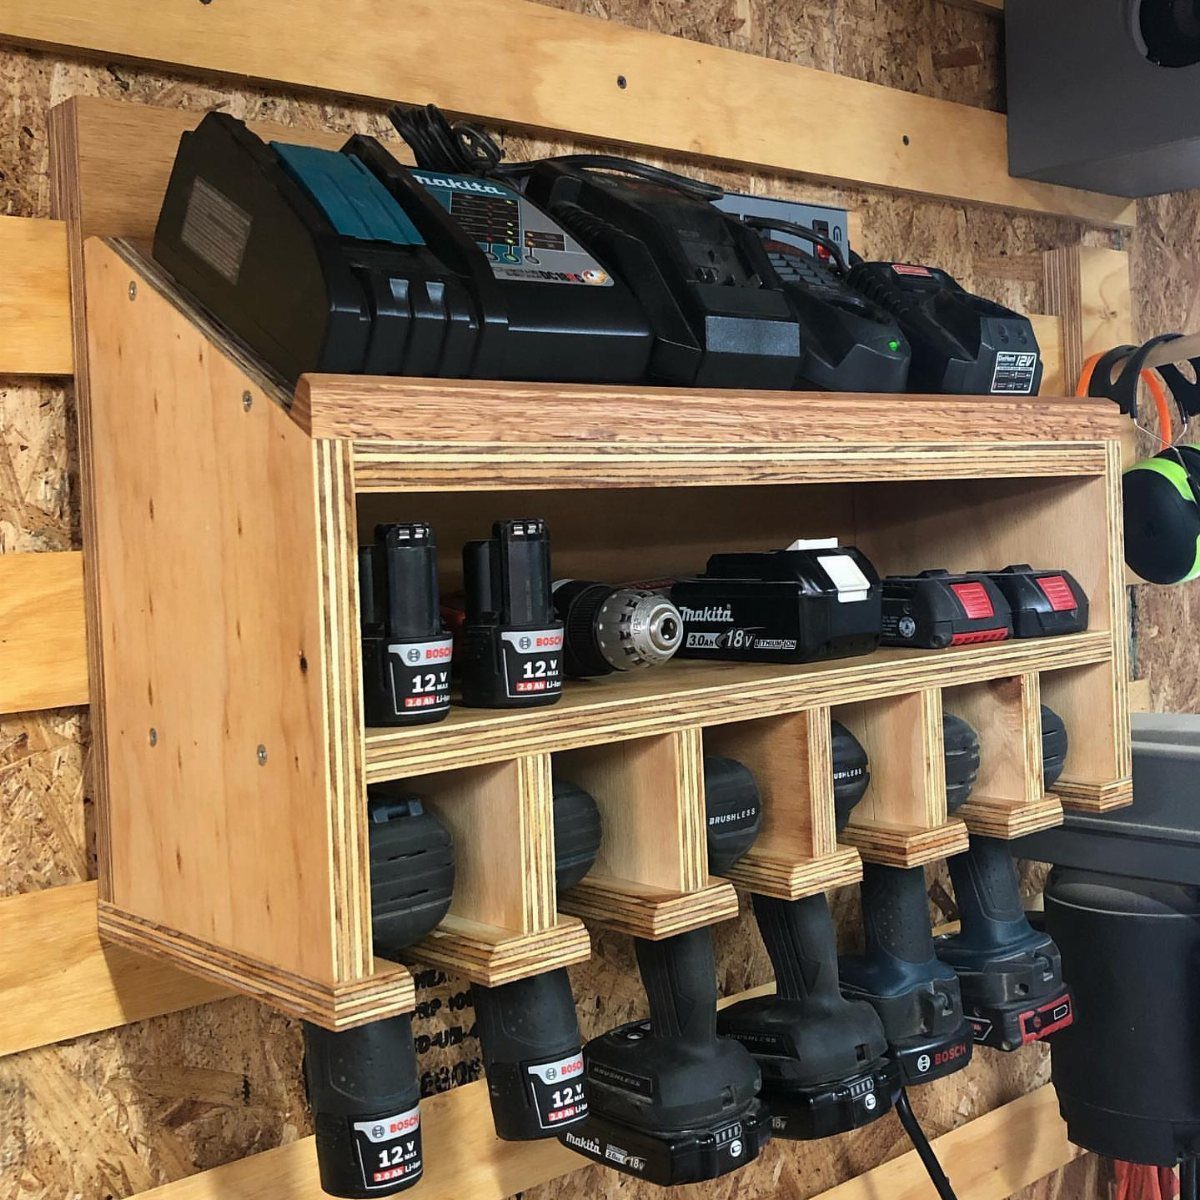
Wall-mounted power tool racks keep cordless drills and sanders off the bench and in a row where you can grab the right one without unstacking cases.
A metal rail and hook system handles the weight when each tool hangs from its own molded slot or battery foot, not a generic peg that might let a grinder slip.
I would check that the mounting holes line up with studs when loading several heavy tools; sheetrock anchors spread the load poorly for sanders.
Color coding by brand or battery platform is a side benefit, not vanity. It keeps you from grabbing the 18V drill when the 12V is the right choice for the job.

High Load Capacity: Made of high-strength steel with a rust-resistant powder-coated finish, this tool cart withstands daily wear and tear while ensuring long-term reliability and stability, with a load capacity of up to 660 lbs

Heavy-Duty Storage Solution: This robust 5-tier tool cart (measuring 30.9 x 17.7 x 37.2 inches) offers organized multi-level storage with three sturdy reinforced trays and two secure lockable drawers equipped with smooth ball-bearing glides. Side-mounted pegboards paired with adjustable hooks enhance tool arrangement, making it perfect for workshops, garages, or outdoor maintenance zones needing reliable, easy-to-reach storage.

Organize your workspace with confidence – our tough blue tool cart brings both style and practicality.Durable Tool Cabinet: Constructed with high-quality steel and finished with a powder-coated surface, this tool cabinet is built to last. Its sturdy frame and corrosion-resistant design ensure long-term durability, ideal for heavy-duty garage tool storage.
8. Small Parts Bin Rack
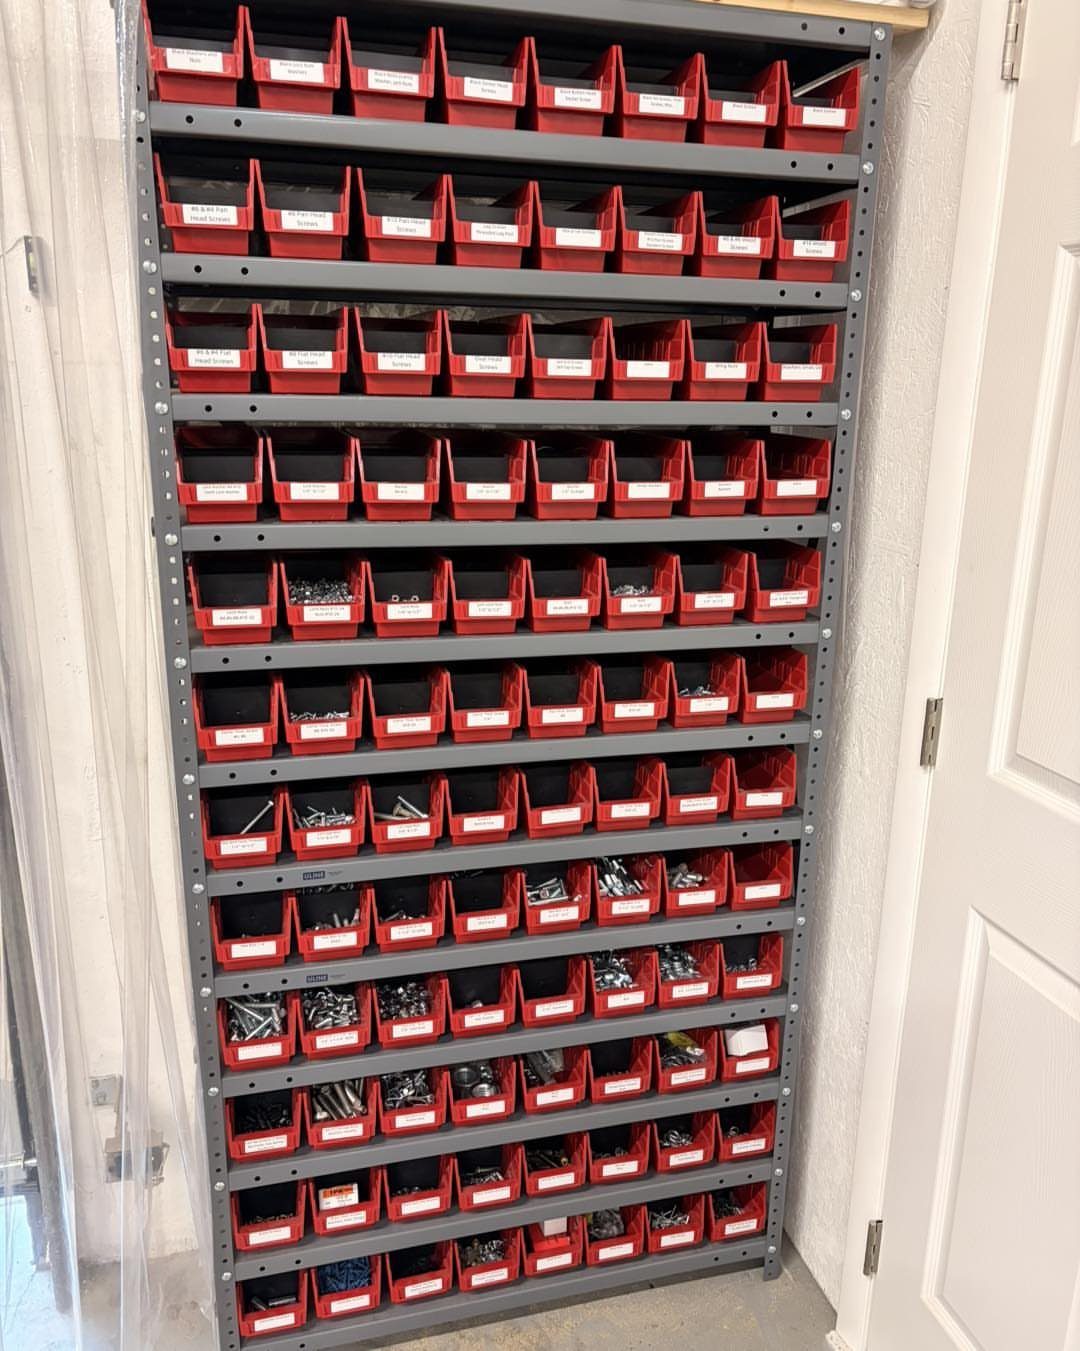
Small parts bin racks turn a narrow slice of wall into sorted hardware storage without the depth a drawer cabinet needs.
Bins that tip forward on their rail let you lift a single screw out without unstacking; that matters when you are holding a workpiece in your other hand.
I would leave the top 2 rows for the sizes you reach for weekly, and the bottom for the specialty fasteners that sit for months.
Open bins in a garage collect dust, so this system belongs inside or in a cleaner shop corner.
Label every bin the day you fill it. The shape of a screw is obvious until you have several nearly identical lengths mixed across a row of containers.

2024 NEW UPGRADE: The size of broom holder is 17inch*2inch. The installation hole distance is based on standard 16" spacing for stud placement, made mounting easy. 5 racks and 4 hooks effortlessly accommodates all your cleaning essentials with a great grip! The wall-mounted design ensures that everything is within reach

Mess-free Organization: Maximize space in your garage, kitchen, laundry room, garden shed, or office with this wall mount broom holder, featuring 6 hooks and 5 slots to neatly store brooms, mops, rakes, shovels, and more.

💪Material - The mop holder is made of high quality stainless steel, Much strong and sturdy than plastic holder. Build to resist daily scratches, corrosion and tarnishing. Allowing it to remain looking its best for longer.
9. Upright Pallet Tool Stand
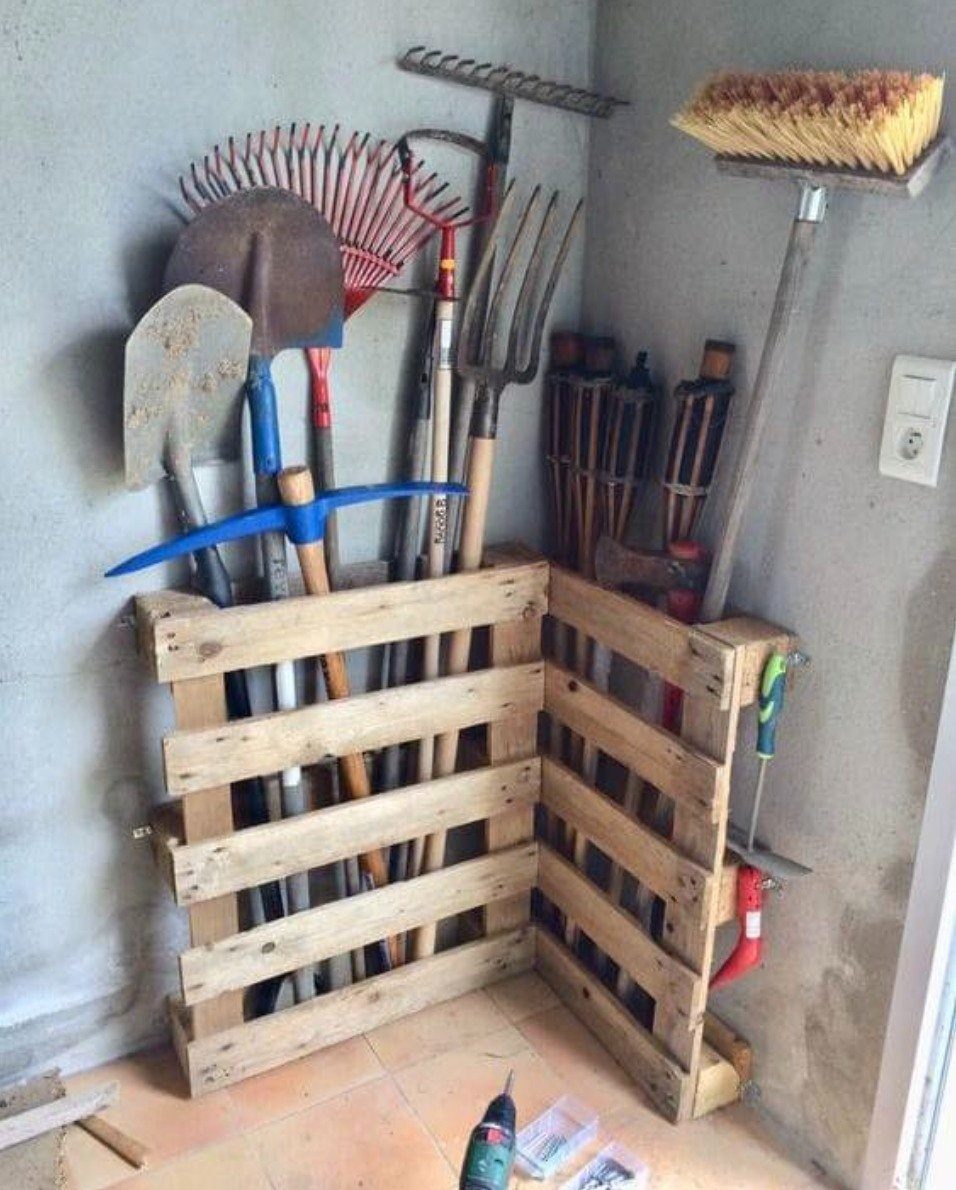
An upright pallet tool stand uses the slats of a single pallet as dividers, turning a corner you were not using into storage for rakes, shovels, and brooms.
A pallet stand sits against concrete with the working ends up, handles slipped between boards that keep them from leaning into each other.
I would anchor the pallet to the wall at the top; the weight is low but the leverage of a 5-foot shovel handle is not.
Check that the gap between slats matches your handle diameters before you commit to this exact pallet, or add a screw to narrow a slot.
It costs near nothing if you have the pallet already, and it keeps the floor clear under the heads. The downside is weather; raw wood in a damp garage rots in a few years unless you seal it.

French Cleat Storage: Designed for use with a compatible French cleat wall system, this hammer holder provides a dedicated storage position that helps keep frequently used hand tools organized and easy to reach.

Considerable Combination to Meet Your Needs: you will receive 12 pieces of wall mounting brackets, 24 pieces of screws in 2 diverse models, including M3*25 and M3*12, each has 12 pieces, 12 pieces of plastic expansion tubes and 6 pieces of silicone dots; The reasonable combination is sufficient for you to use and replace, and can easily meet your daily use and other requirements
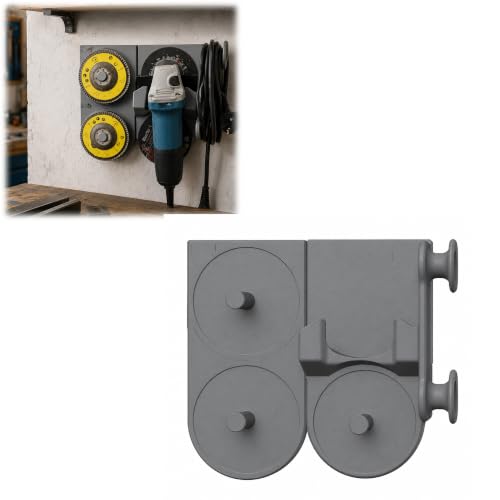
1. Dual Storage Function: Combines an angle grinder holder with disc storage space, providing a convenient organization solution for power tools and abrasive accessories.
10. Stackable Modular Tool Boxes
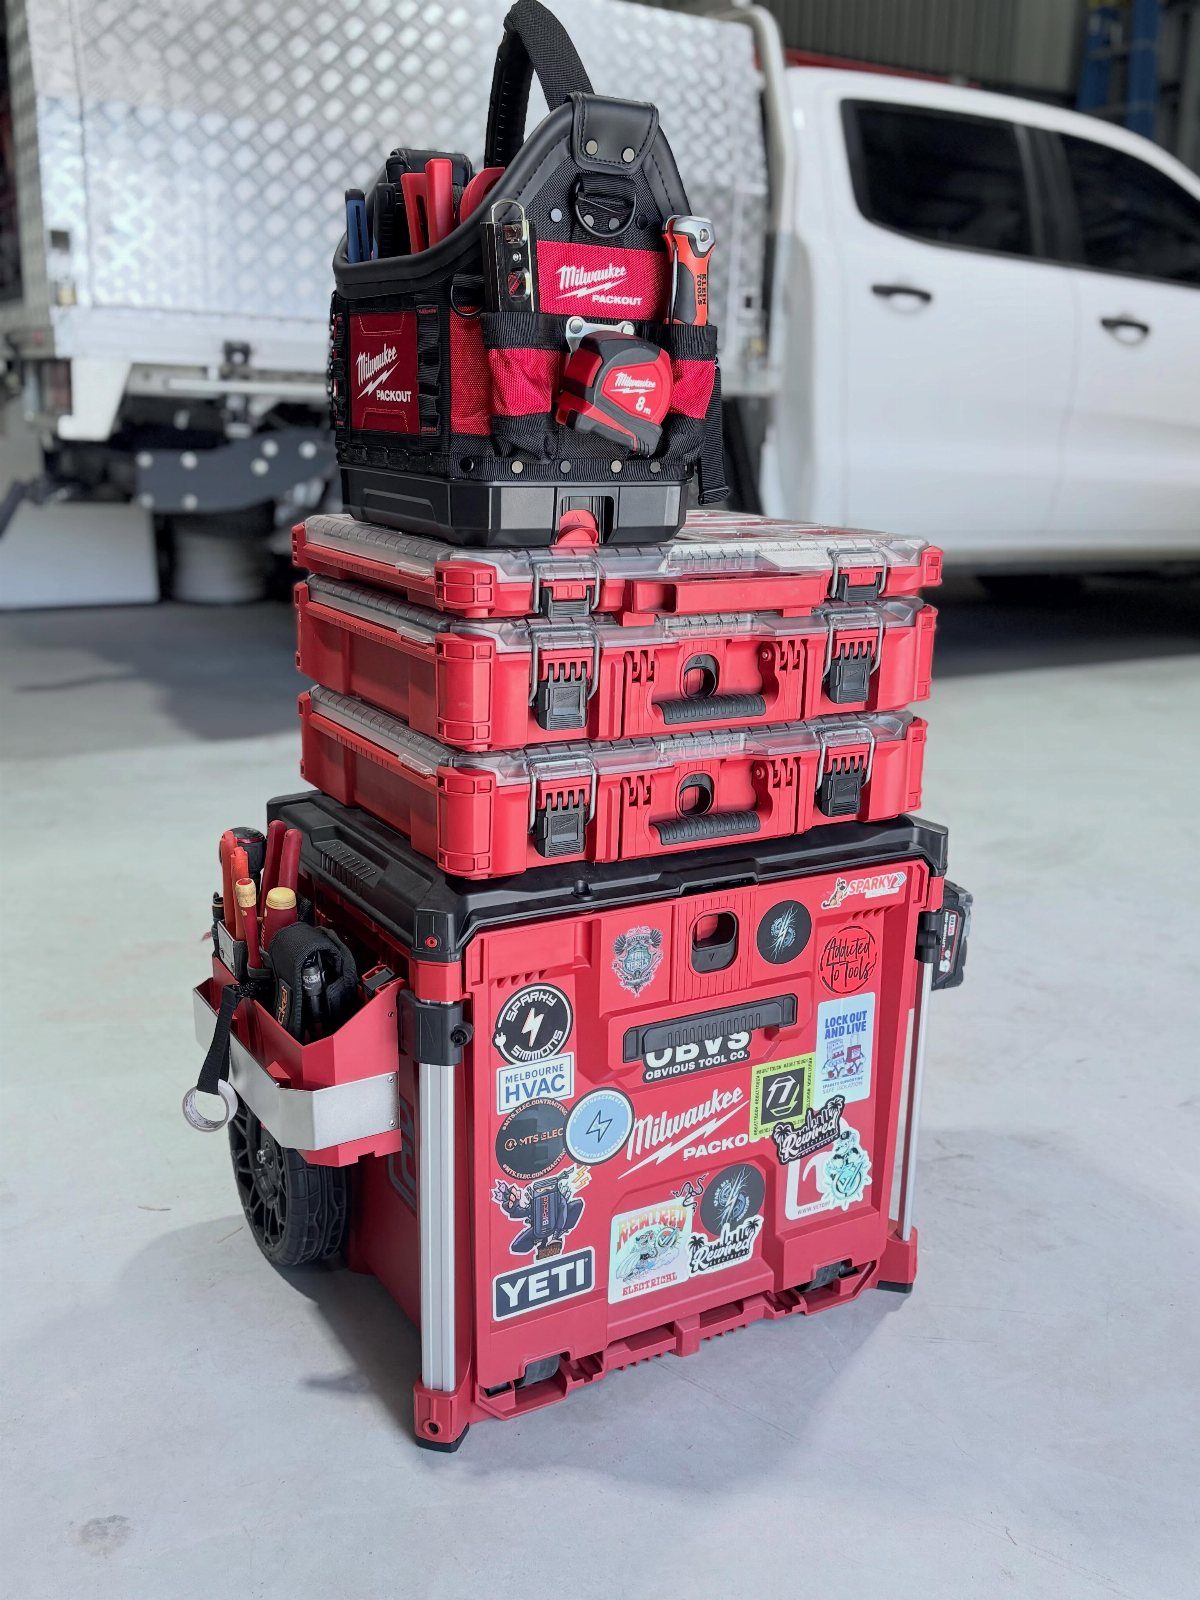
Stackable modular tool boxes let you build a tower that matches your collection instead of buying one oversized chest.
Cases that latch together let the stack move as one unit, but unclip when you need only the plumbing kit or the electrical set at a job site.
I would start with one box and add levels as your tools grow; buying the full stack early leaves you carrying empty volume.
The wheels on the base unit are the detail to check, caster quality varies and a loaded tower is heavy.
This system suits someone who works in more than one spot, garage to basement to driveway. If your shop is fixed, a wall system gets you there faster.

METAL NAILBOARD: Our peg board panels are made of high quality steel with a powder coated finish that is strong, scratch resistant and easy to clean. Each small pegboard has a weight capacity of up to 50 lbs. This is a favorite product for tool organizers, DIY enthusiasts, store owners and office workers.

COMPACT DESIGN - Make the most of the limited space on your pegboard! Uses half the pegboard space as typical pegboard pliers hooks (SEE 2ND PRODUCT IMAGE).

Organize Power Tools: This organizer holds power tools and drill accessories on the wall for easy access and organization.
11. Staircase-Mounted Mason Jars
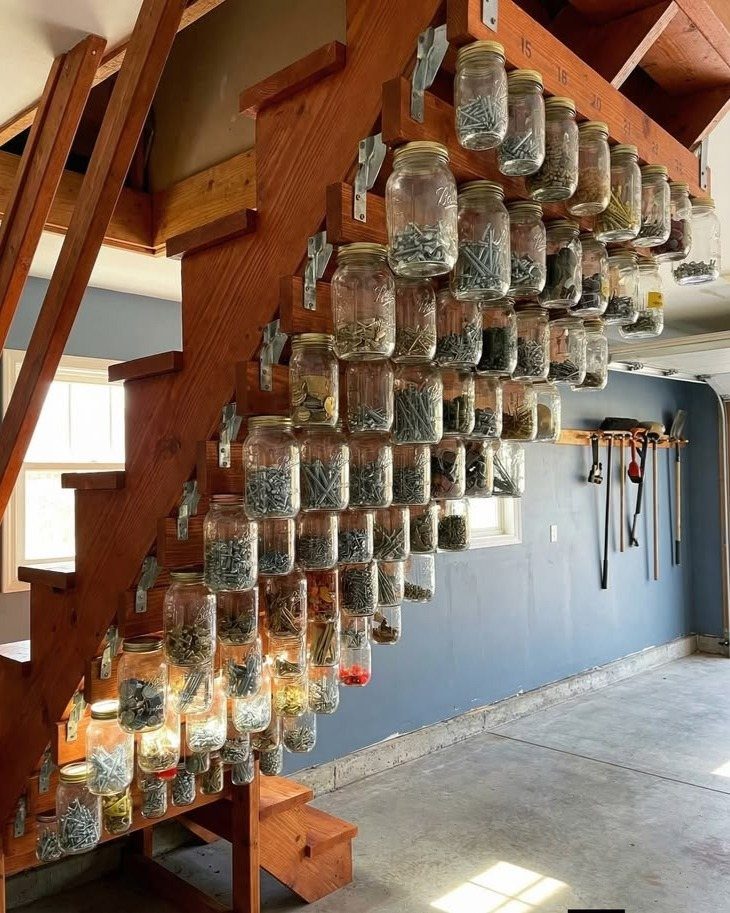
Staircase-mounted mason jars turn the wasted side of garage steps into visible hardware storage, each jar showing its contents without a label.
Jars screwed to the stringer through the lid twist off for use at the bench and screw back when you are done.
I would use this for the fasteners that match your house, the repeat sizes you reach for on every project, not the one-off specialty screws.
Glass breaks; mount high enough that a kicked soccer ball or dropped 2×4 does not turn your sorted bolts into a hazard.
The wood behind needs to be solid, stair stringers are often painted softwood that splits under load. Check the grain before you drill.
12. Labeled Clear Organizer Bins
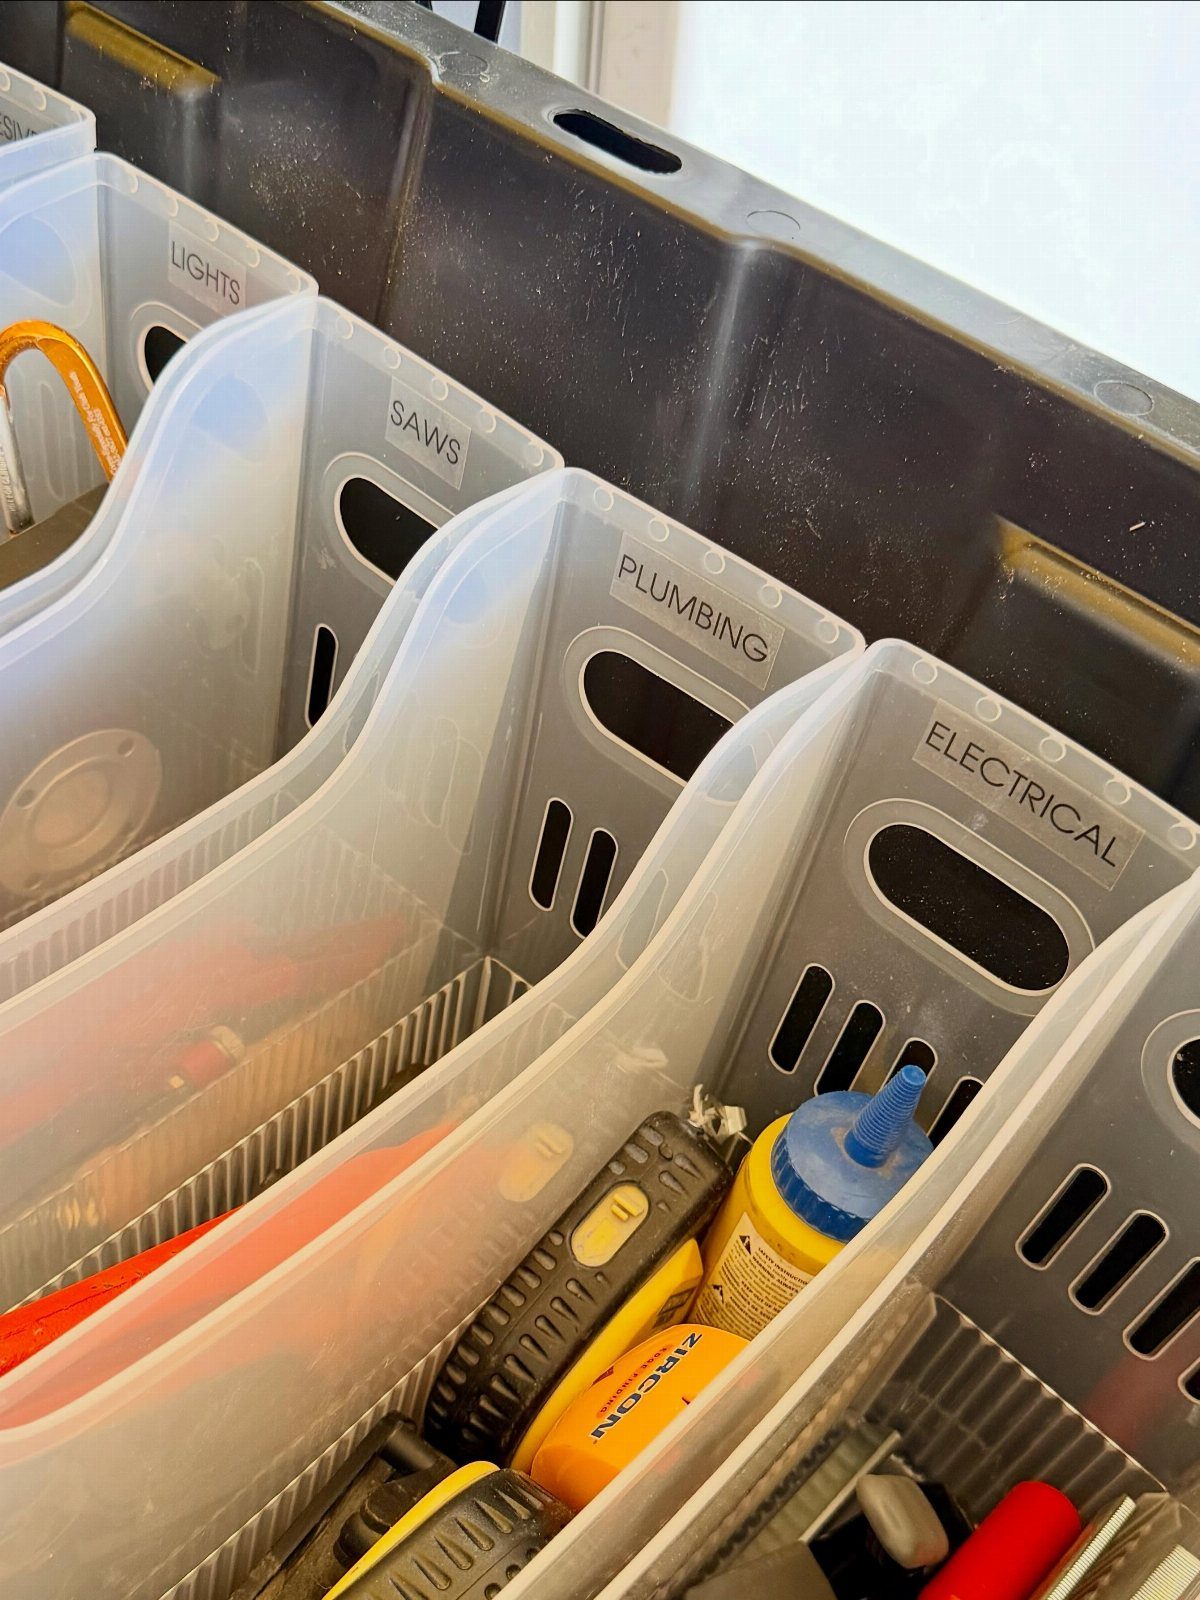
Labeled clear organizer bins let you sort tools by job instead of by type, which is how most of us actually work.
A tote holding separate bins for lights, saws, plumbing, and electrical lets you grab the relevant bin and leave the rest.
I would use a permanent marker on masking tape for labels, not printed ones, because the category that made sense in January shifts by June.
Clear sides show you at a glance whether the bin is worth carrying to the project; opaque lids defeat the purpose.
This system trades the pride of a wall display for portability and flexibility. It suits renters and anyone whose shop is a corner of the basement that needs to look like storage again by Sunday night.
Use Clear Containers
Clear containers work because they remove the step of opening, guessing, and opening again.
Clear plastic shoe boxes and open white dish tubs do the same job: you see what is inside before your hand gets to the lid. An open bin is faster still, and cheap.
When project time is limited, the friction of finding tools kills momentum. A bin that holds everything for one job lets you grab it and work in the scraps of time that a busy week actually offers.
I would label the outside too, because clear plastic scratches and fogs over years, and a bin that was obvious in January can turn mysterious by December.
The mesh organizer from The Container Store that I have repurposed through 3 rooms now holds paint brushes and spare bulbs in my own setup; a good piece keeps earning its keep as your needs shift.
Purge and Organize Tools
Purging is the step most people skip, and it costs them later. Space makes a hoarder of everyone: old paint brushes, duplicate wrenches, the one socket from a set that never fit your hand.
I would pull every tool out before putting one back, even if it takes over the floor for an afternoon.
Seeing the full pile is what makes the sort honest. Group similar items only after everything is visible: paint supplies together, demo tools together, safety gear in its own heap.
The size of each pile tells you what size storage it needs, and you will find categories you were splitting across rooms without reason.
The same clamp set often lives in three spots because no one ever spread them out at once to see what they had.
A drawer liner at the bottom keeps the kept tools from sliding; that detail matters more once you have done the work of deciding what stays.
Safety and Accessibility
Wall storage for sharp and heavy tools is not about neatness; it is about not reaching past a blade you forgot was there.
Keep the floor clear of clutter, spills, and sawdust that turns a step into a fall. A fire extinguisher rated for electrical and chemical fires belongs within reach, not buried behind a stack of lumber.
Same for a first-aid kit, goggles, ear protection, and gloves: if they are not easier to grab than the tool, you will skip them.
Ventilation matters too; exhaust fans or open windows keep the air safe when you are cutting or sanding. Pegboard with added shelves and containers can handle the tiny items that roll off a bench and vanish.
The rule I follow is that the tool you reach for daily lives on the wall at arm’s reach; everything else can live in a drawer or bin where it waits safely.
Frequently Asked Questions
What are some good organizational ideas for a tiny room?
Vertical wall systems are the first place I would look.
Pegboards with slotted hooks keep hand tools reachable without touching the floor, and French cleats let you rearrange custom holders as your collection changes. Both systems turn wall space into storage that adapts rather than fills.
What are some tools to stay organized?
Pegboards for daily drivers, drawer chests with foam cutouts for the rest, and clear bins labeled in masking tape for job-based totes.
