
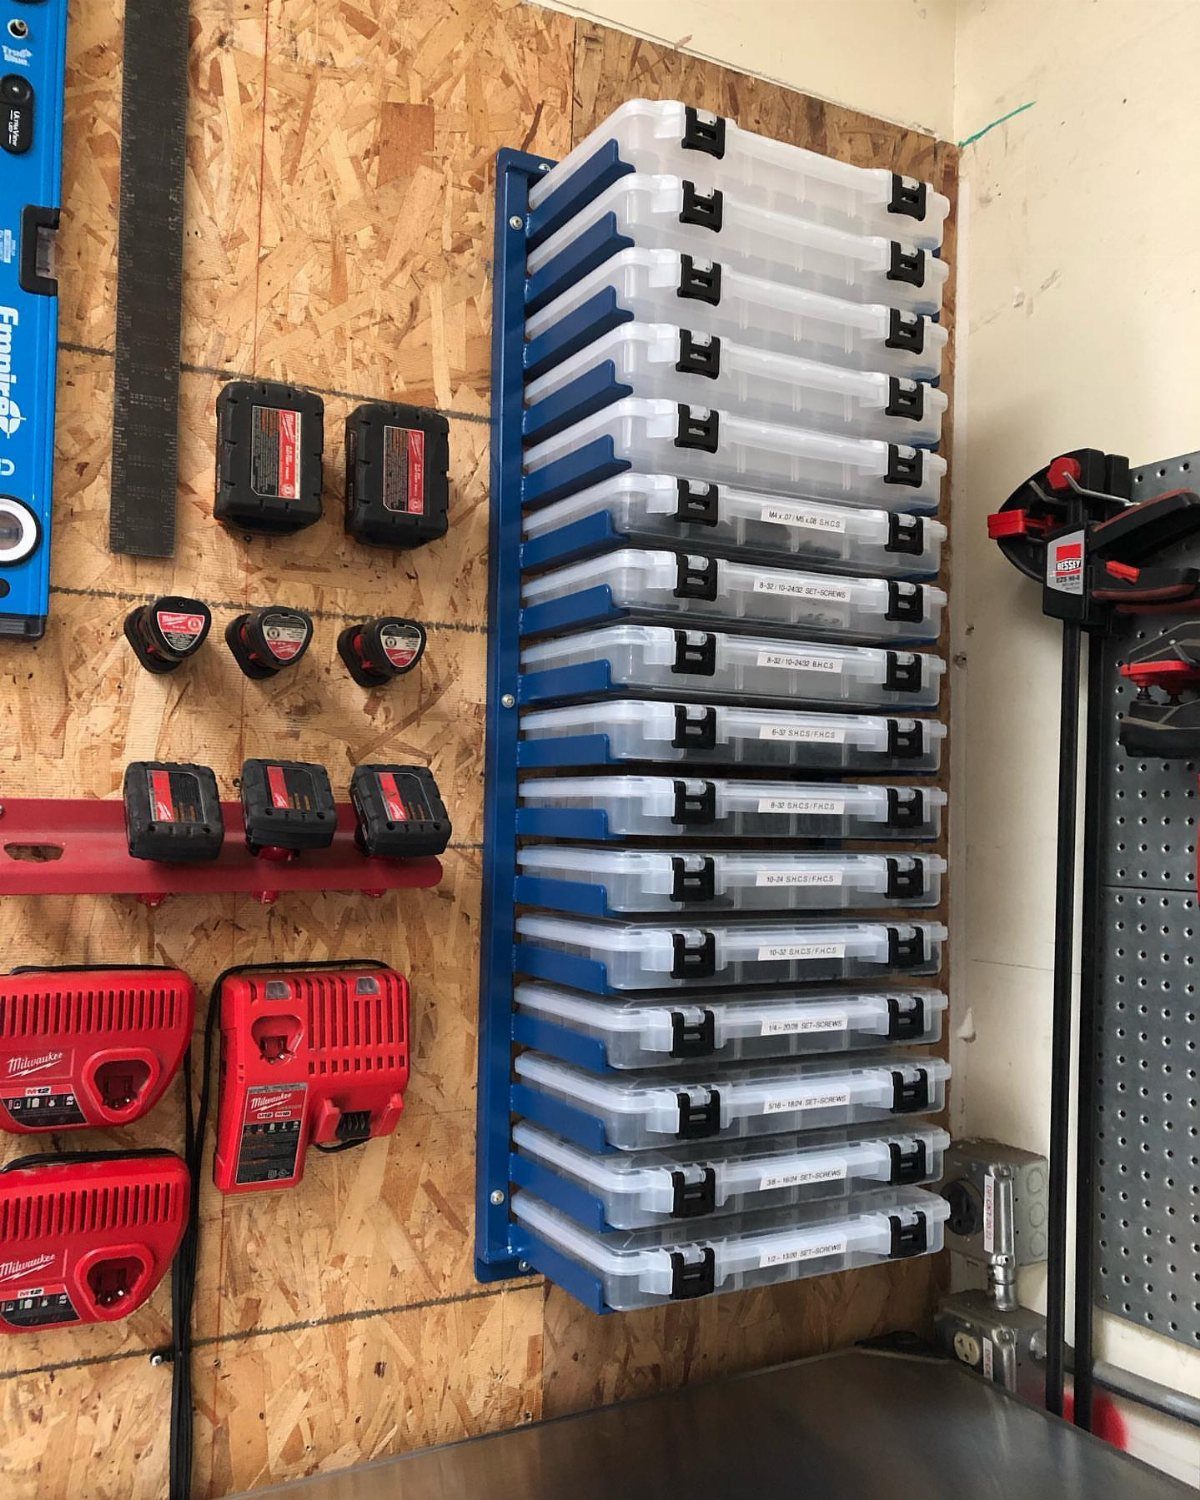
These ideas run from a few dollars in PVC to a full ceiling rack system, and the one that fits you depends on whether you need to keep your floor clear or can spare the square footage.
1. Storage Bins
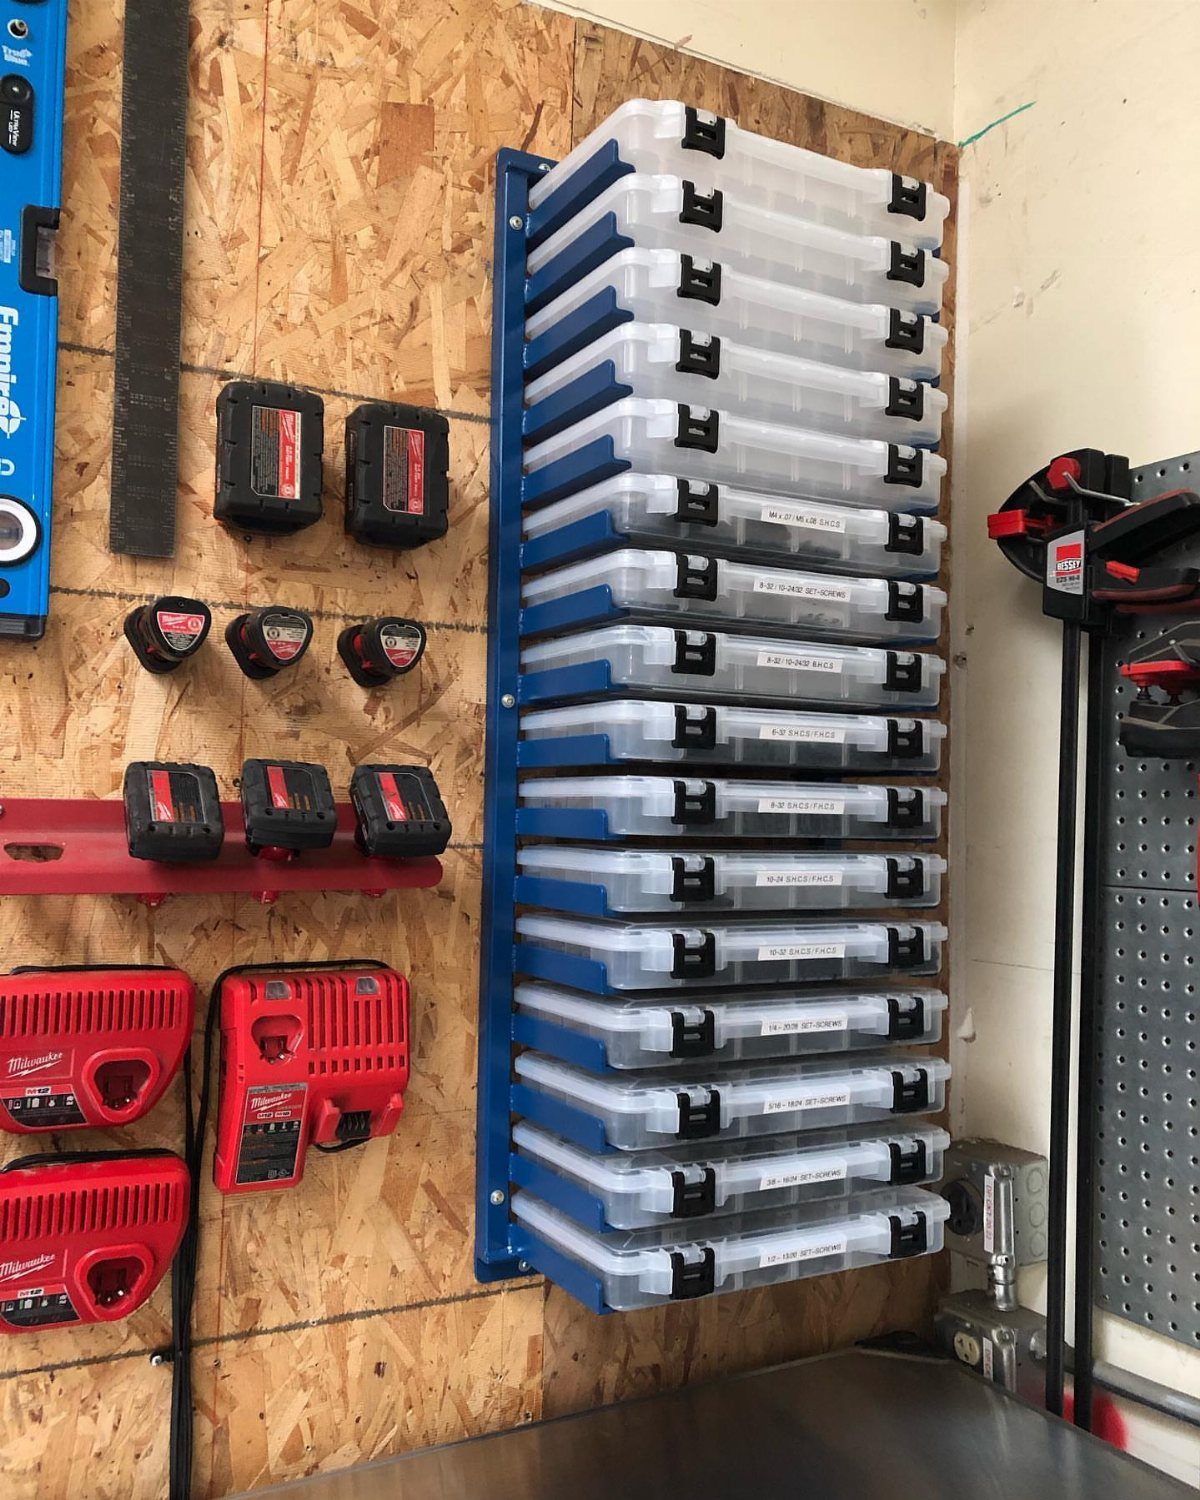
Clear bins earn their spot when you need to know what you have without opening every lid.
Keeping bins vertical matters more in a small shed than most people plan for. I would label every bin before it goes up, because the clarity you gain from seeing contents fades fast once dust covers the plastic.
Check that your wall can take the weight when full; OSB holds screws well, but drywall or thin paneling needs anchors or a backer board.
This setup suits anyone who owns a mix of hardware, fasteners, and small parts that currently live in coffee cans.

Large 112Qt Stackable Storage Bins:Each tier measures 16.3" x 12.56" x 8.86", total 112Qt capacity. Ideal for organizing, crafts, clothes, and more in closets, bedrooms, garages, or offices.
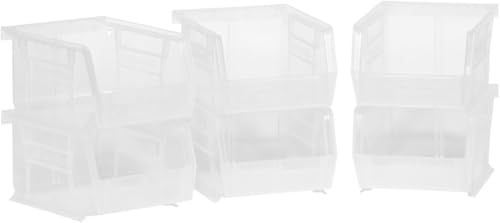
MULTI-PURPOSE STORAGE BINS: These stackable storage bins hold up to 10 pounds and are great for classrooms, garage storage, pantries, craft storage, bathrooms; Use them to store cosmetics, office supplies, small toys, or hardware
2. Install Pegboards
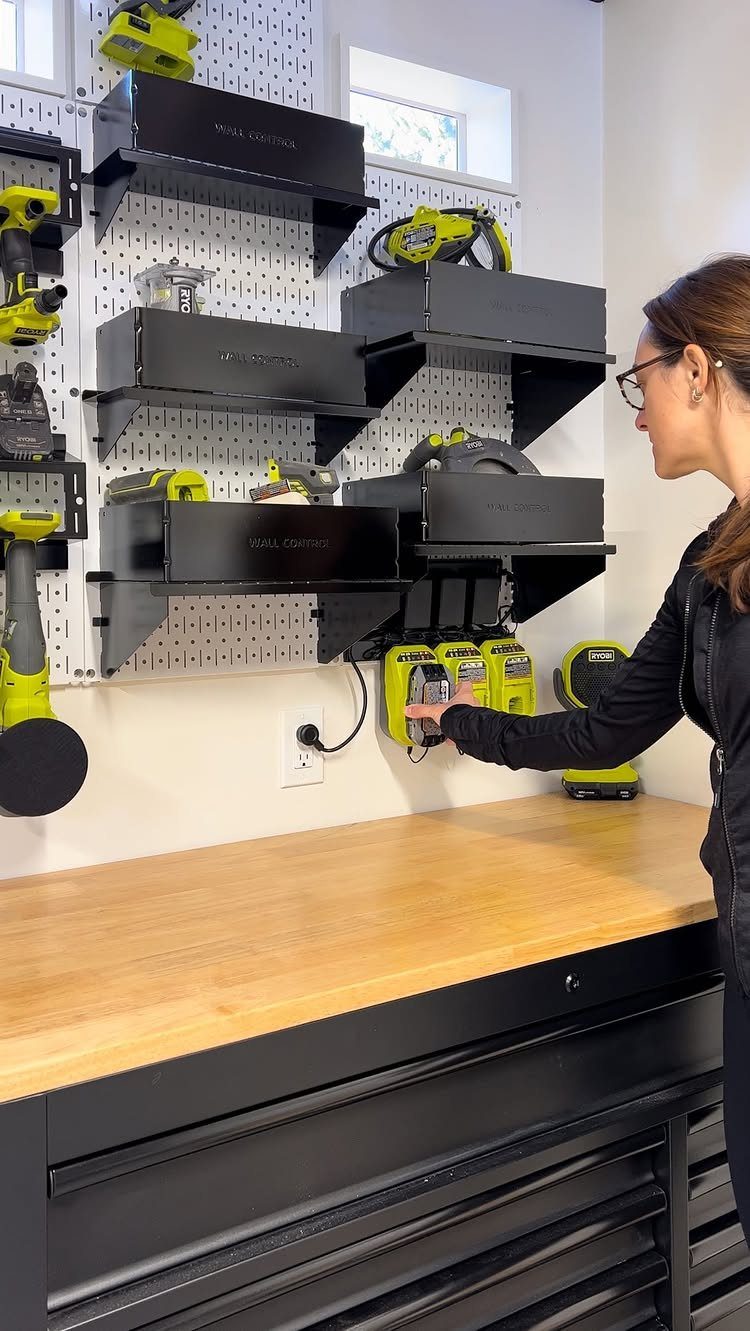
Metal pegboard beats the pressed fiber kind for a shed, where moisture swells anything organic. A white grid with black shelves and bins keeps the visual clean, though I tend toward darker colors in spaces that see dirt and grease.
Before you commit, trace your actual tools onto paper or cardboard and test the layout at waist height; bending and reaching for the same drill gets old fast.
Wall Control is one system that locks accessories in place, which matters when doors slam or wind blows through. Budget more time if your wall is uneven; a flat surface makes this a faster job.

METAL NAILBOARD: Our peg board panels are made of high quality steel with a powder coated finish that is strong, scratch resistant and easy to clean. Each small pegboard has a weight capacity of up to 50 lbs. This is a favorite product for tool organizers, DIY enthusiasts, store owners and office workers.

All Metal Material: Our garden tool organizer, both backboard and hooks are made of iron, which makes it more durable and solid.And its load-bearing capacity far exceeds other usual ABS material tool hooks. It is deal for various tools like shovel, rakes, bikes, broom, mop, trust that what you get is what you see,any dissatisfaction please contact our customer service team
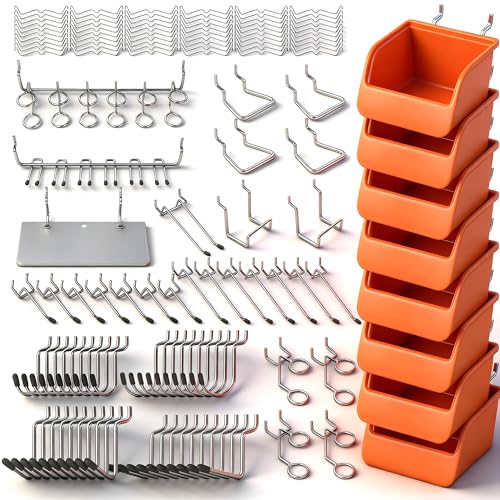
Product includes 15 different types of hooks and organizers, and is fully functional for a wide range of hanging applications.
3. Tool Racks
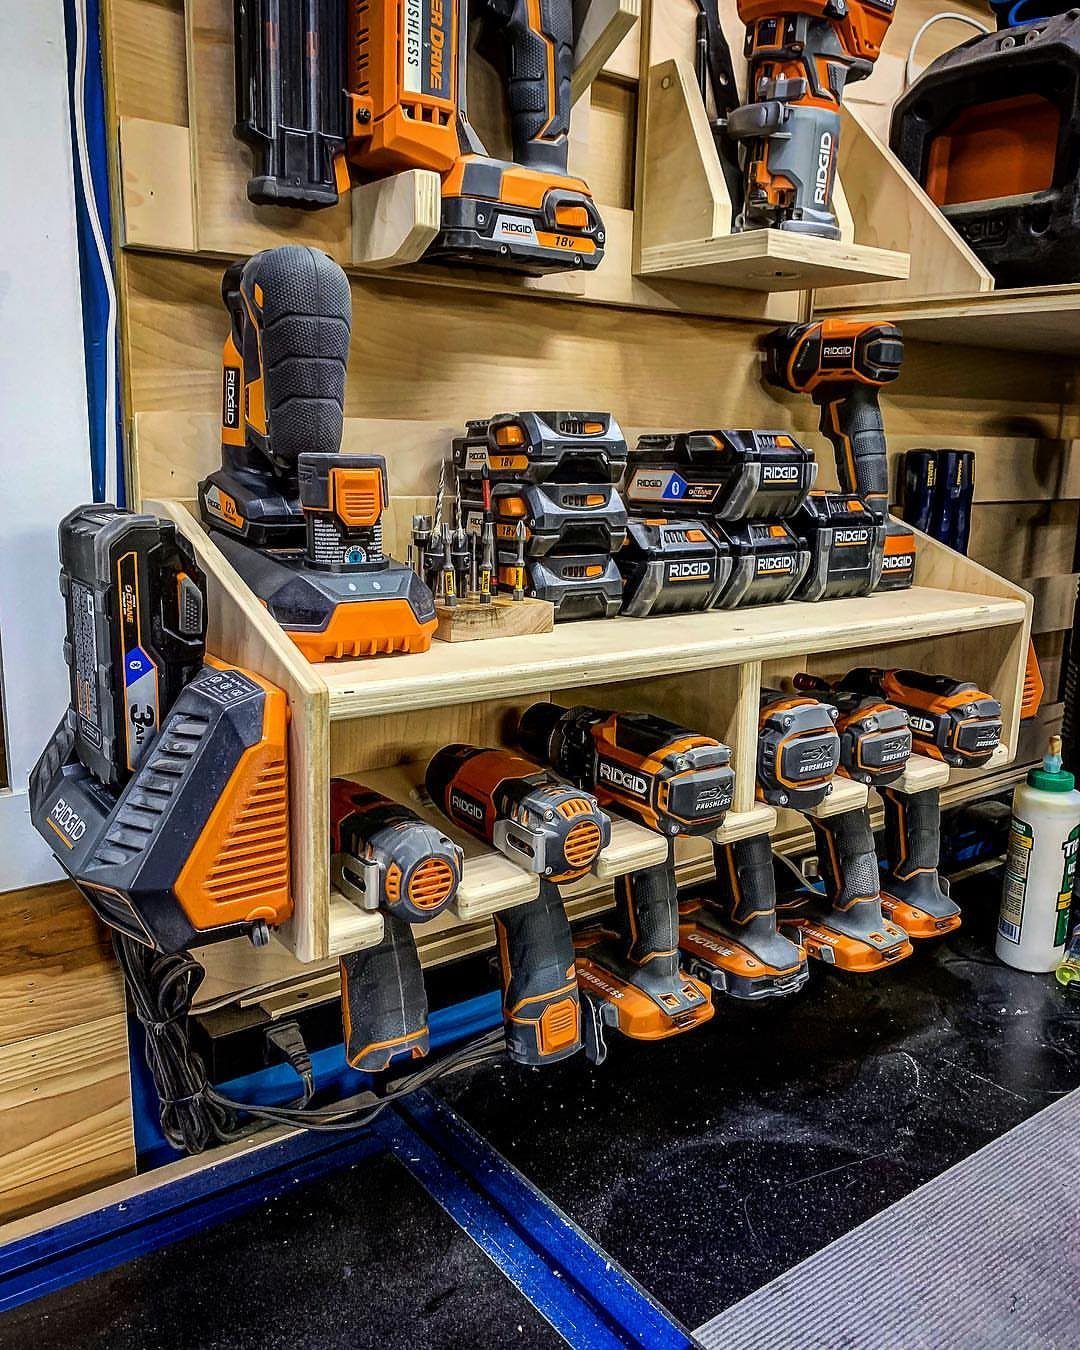
A custom wooden rack for cordless tools solves the problem batteries create: they do not hang neatly on hooks and they roll off shelves.
Drills lined up by type with chargers integrated below tells me the builder uses these tools often enough to prioritize access over density.
I would build the shelf depth to your largest battery pack plus half an inch, no more, because wasted depth becomes clutter catchment.
Pine works fine if you seal it; plywood resists warping better in humidity swings. This approach trades wall space for order, so it suits sheds with more linear feet than square ones.
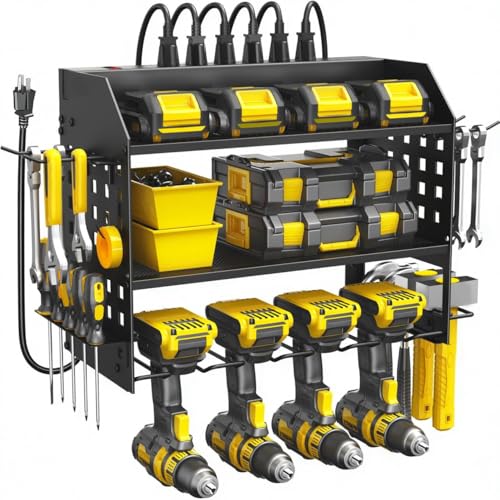
【Integrated 6-Outlet Power Strip】 The power tool organizer features a built-in 6-outlet charging station with a heavy-duty cord, allowing you to charge multiple cordless tool batteries (drills, impact drivers) simultaneously. No more tangled extension cords or searching for available wall sockets in your garage.

✅【STORE MORE. CHARGE SMARTER】Tired of running back and forth to charge batteries? Meet Jaxon Power — a power tool organizer wall mount with a built-in 8-outlet charging station. Store your tools and power them up in one place. No clutter, no hassle — just a cleaner, smarter workspace.

4-Outlet Power Strip:This garage shelf wall mount features an integrated 4-outlet power strip with a 6.5-foot cord for easy charging. Charge your tools directly on the shelf without the hassle of searching for outlets. By combining storage and functionality, this tool rack saves space while ensuring your power tools are always ready for use.
4. Magnetic Strips
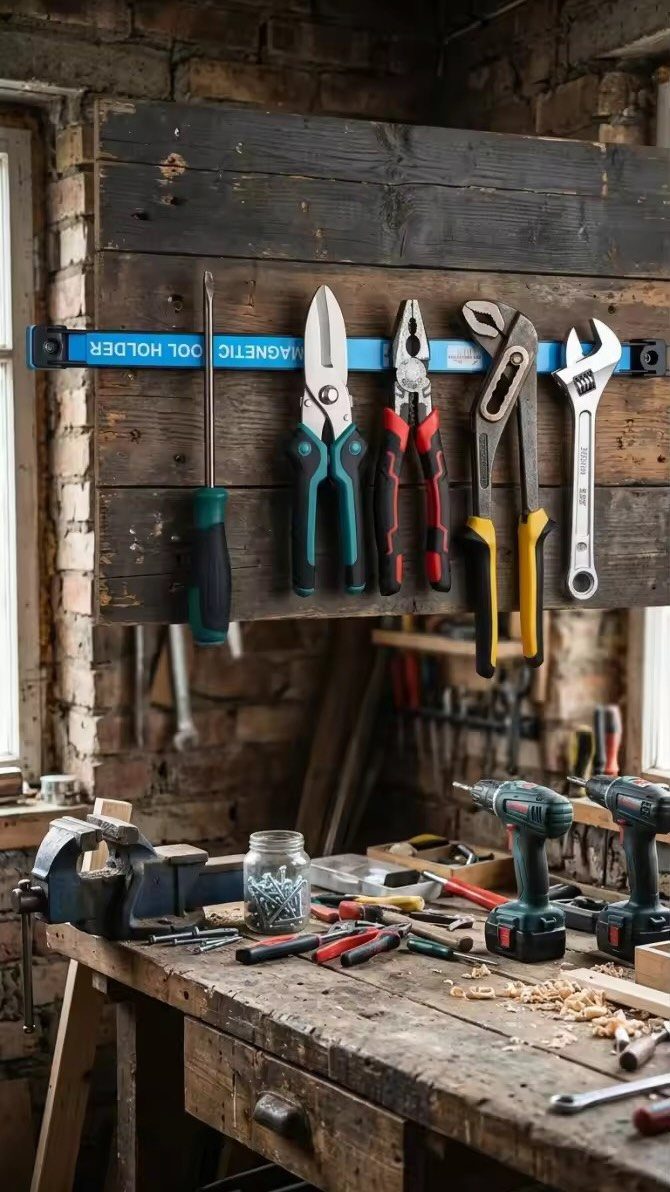
A magnetic strip keeps hand tools visible and reachable, which sounds simple until you realize how much drawer rummaging it replaces. Mount the strip above the workbench, where pliers and wrenches live at arm’s length from where they get used.
I would not trust magnetic hold alone for expensive or heavy items in a shed that shakes when you close the door; a small lip or shallow tray below catches what a bump dislodges.
Check the magnet rating before you buy, cheap strips sag under real weight. This works best for the subset of tools you grab 10 times a session, not the whole collection.

EXCEPTIONAL DURABILITY - Boasting of high-quality alloy steel construction, this Magnetic Tool Holder Storage Organizer provides unmatched sturdiness and longevity. The power magnet strip is a heavy-duty solution for tool organization.

POWERFUL MAGNETIC RETENTION - Features high-strength alloy steel construction with powerful magnet strips that securely hold wrenches, pliers, and screwdrivers in place, providing exceptional durability and long-lasting organization for workshops and garages

MAGNETIC TOOL ORGANIZER: Declutter your workspace and store wrenches, screwdrivers, knives, and more within easy reach. Ideal for garage storage or as a kitchen knife holder, this magnetic bar keeps your space cleaner, safer, and more efficient.
5. Empty and Declutter
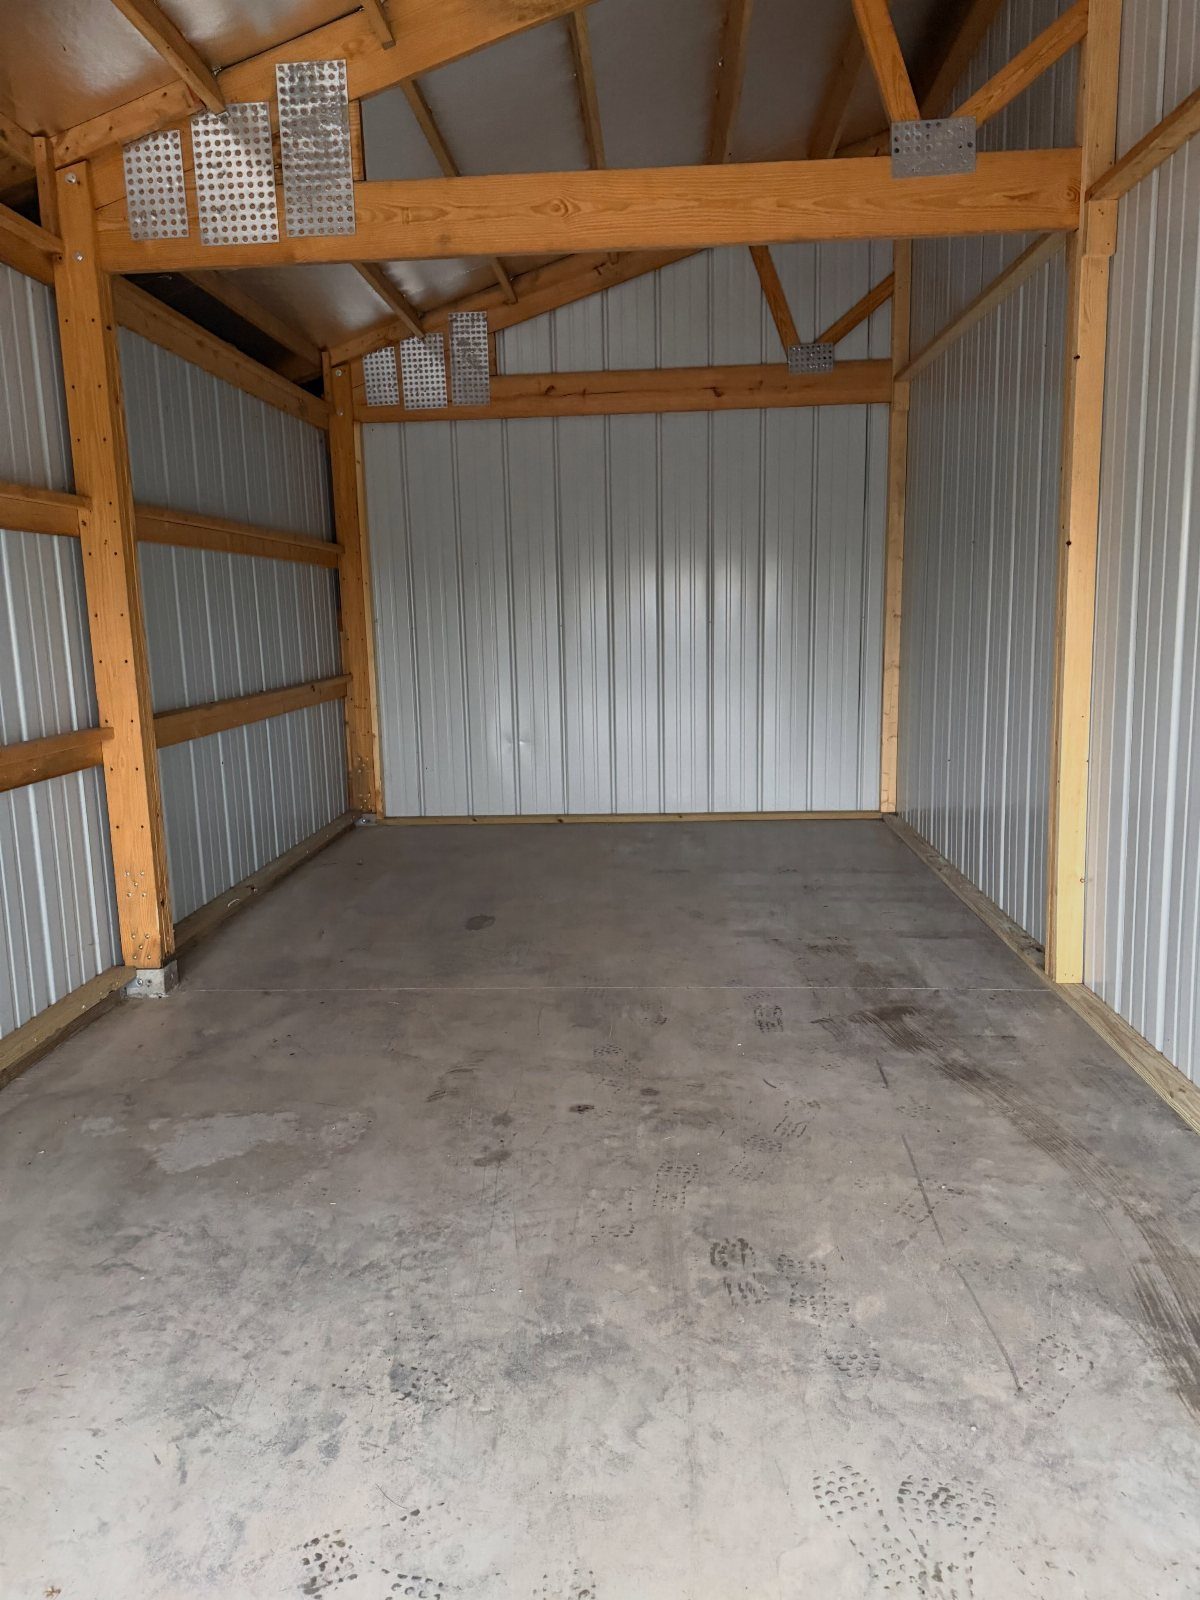
Stripping a shed to its bones before you organize is the step most people skip, then they wonder why the new system buckles under old junk.
Strip the space to bare concrete and exposed framing so you can see the actual footprint, the water stains, the spots where light falls and where it does not.
I would sweep, then hose, then let it dry completely before anything returns; the concrete tells you where moisture pools and whether your current shelving is rotting from below.
Sort into keep-here, keep-elsewhere, donate, and discard piles. Only the keep-here pile earns a place in your new layout.

Suitable for wood stud spacing of 16", 18" or 24". NOTE: The shelves can only be installed separately for 24" studs. Can NOT be mounted to metal wall.

DIY INSTALLATION: Our heavy-duty garage shelving can be easily installed in various configurations to suit your specific space requirements, providing you with versatile storage solutions. You have the flexibility to choose whether the baskets are interlocked or separate, and whether they hang on the shelf or mounted on a wall. Whether you need storage in your garage, workshop, yard, or garden, our DIY installation offers the ideal solution to meet your needs.

YOUR ITEMS, YOUR WOOD – YOU SUPPLY IT: Supply 3/4" thick wood (e.g., 1x4 to 1x10 pine or plywood, sold separately) for custom-fit shelves that match your items.
6. PVC Pipes

Cut PVC into short holders and you get individual slots for shovels, rakes, and long-handled tools that otherwise lean in corners and fall on cars.
Wall-mounted pipe only works if the diameter matches your handles; check yours before you buy. I would mount them with a slight upward angle, maybe 10 degrees, so tools stay put but lift out without fighting.
PVC is cheap and indifferent to moisture, but it gets brittle in UV over years; under a roofed shed wall it lasts fine. Check that your longest tool handle clears the ceiling when vertical, or angle the whole row lower.

ORGANIZERS AND STORAGE: These durable storage bins are great for creating a clean and organized garage, shed, barn, cabinet, closet, or office and ideal for tools, cleaning or home repair products, gardening supplies, spray cans, and more

DIMENSIONS: 18.5" L x 15.13" W x 9.38" H -- Inner Dimensions: 15" L x 10.88" W x 9" H

Large Storage Bins for Any Spaces-- A set of 6 XL organizer bins, make it easy to organize and declutter messy kitchen, cabinets, closets, pantry, bedroom, dining room, laundry room, nursery, garage or sink, and make your life easier.It can hold a variety of items including snacks, drinks, spices, cleaning supplies, cosmetics, perfumes, canned foods, personal care items, office supplies, crafts, medications, bottles, books, meeting all of your storage needs.
7. Wooden Pallet Tool Storage
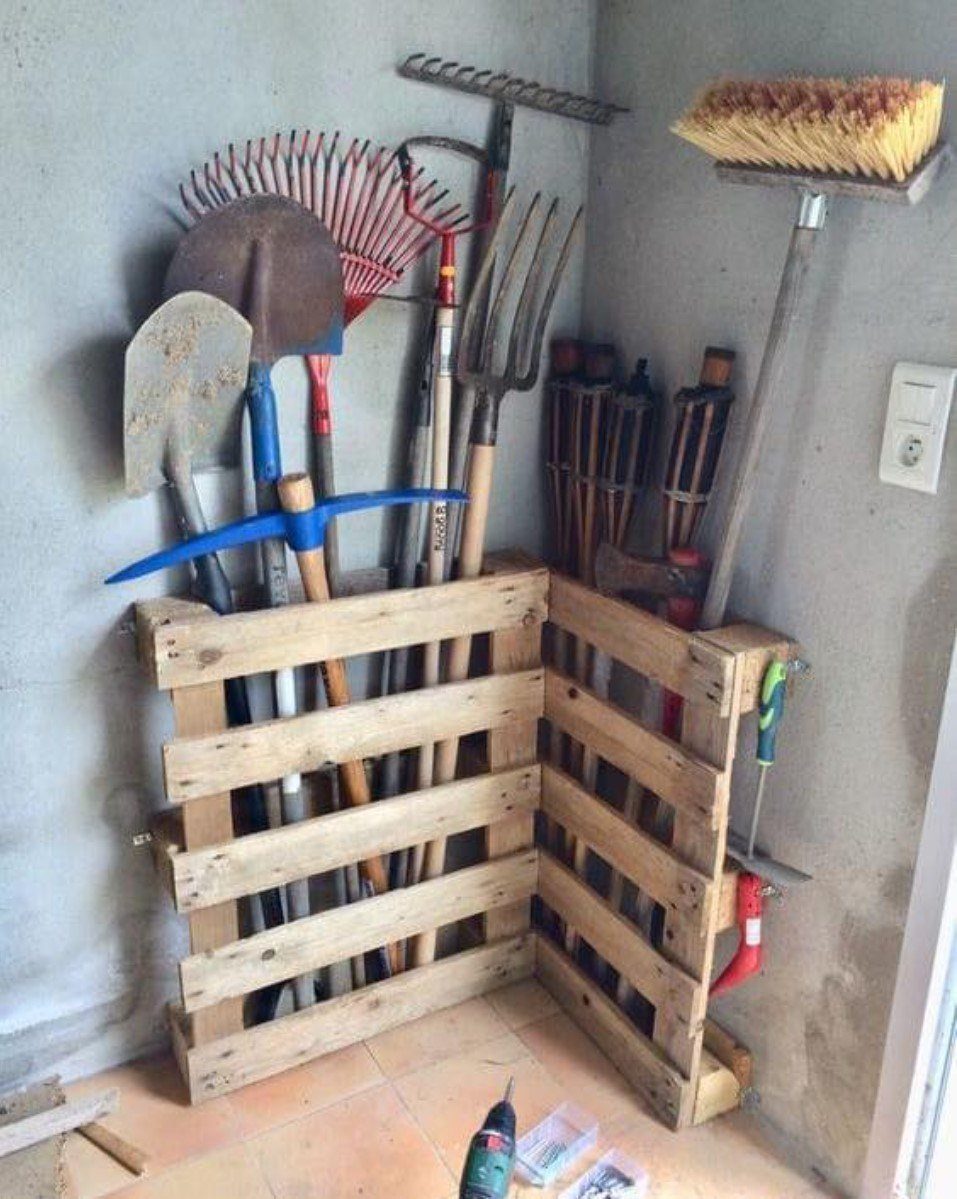
2 pallets screwed together in a corner give you vertical slots for long-handled tools without a single cut to the wood itself.
The slats space naturally for rakes and shovels; the corner brace keeps the whole thing upright without legs eating floor space.
I would check that both pallets share the same slat spacing, or one tool will lean while its neighbor stands straight.
Pressure-treated lumber resists rot but leaves green marks on handles over time; a quick seal on the inside faces prevents that.
This suits renters or anyone who wants storage that moves with them, since the whole unit lifts out in one piece.

Organize Your Tools with Ease: This pegboard keeps tools neatly organized instead of loose on your workbench or crammed into a small toolbox. The perfect solution for tidying up your workspace and finding what you need quickly.

METAL NAILBOARD: Our peg board panels are made of high quality steel with a powder coated finish that is strong, scratch resistant and easy to clean. Each small pegboard has a weight capacity of up to 50 lbs. This is a favorite product for tool organizers, DIY enthusiasts, store owners and office workers

Suitable for organizing garage tools or garden tools and all kinds of tools. Fits all standard 1/8" and 1/4" pegboard hooks. A nice choice for storing and holding your tools in home, garage, apartment, utility room, basement or shed.
8. Wall-Mounted Hose Hanger
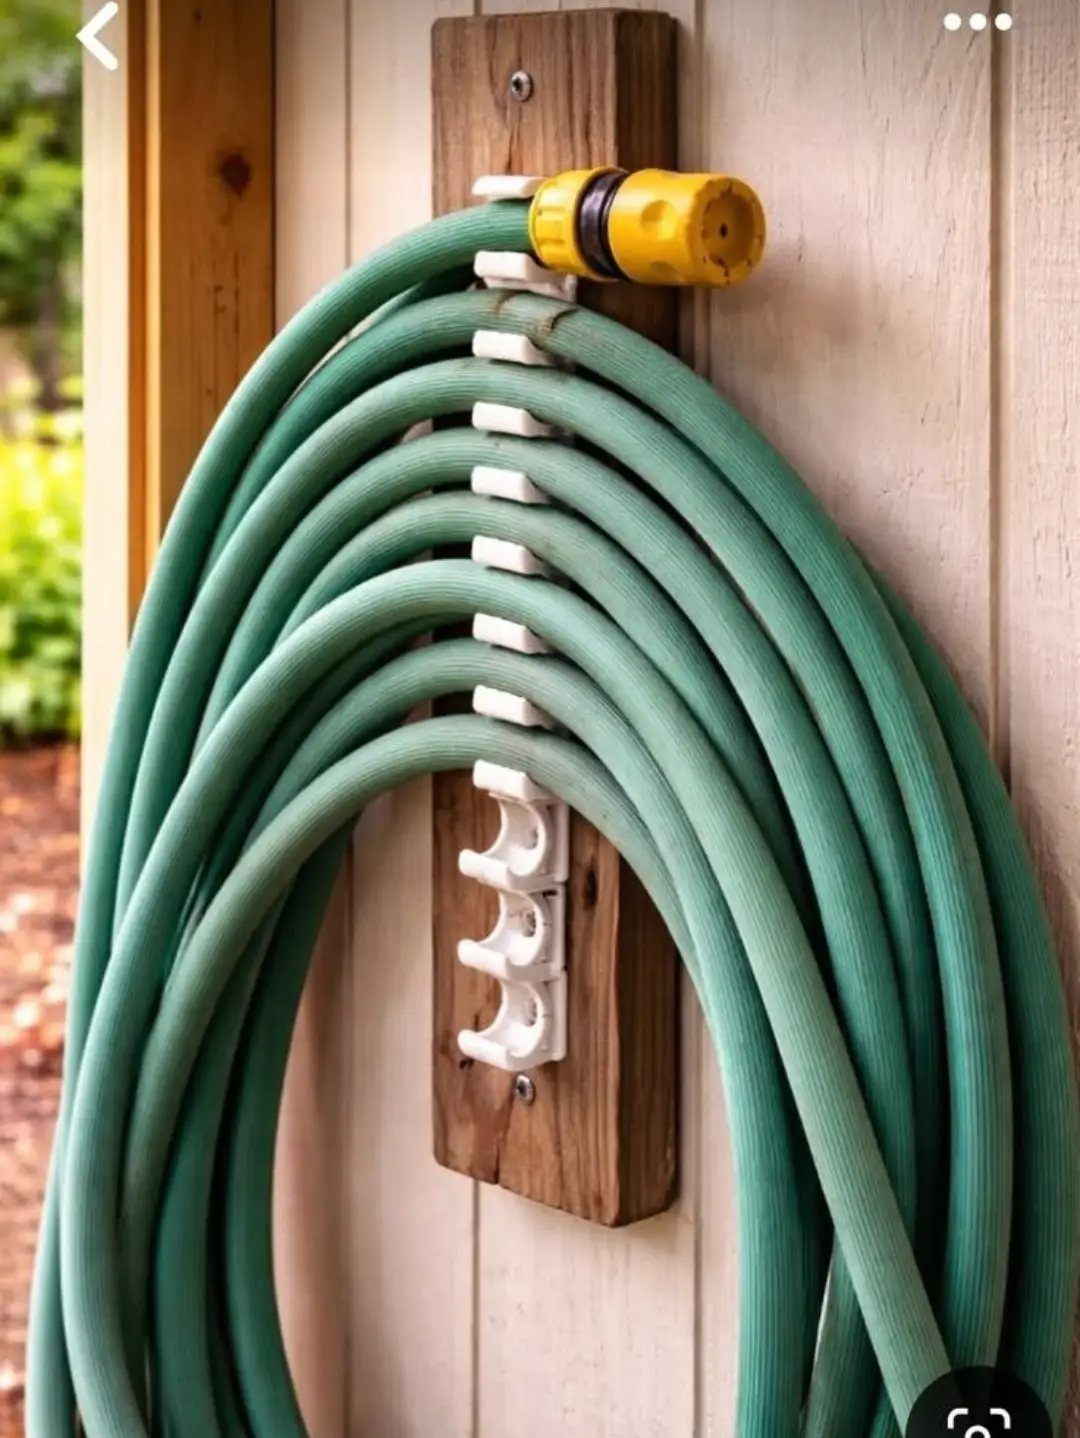
A wall-mounted bracket with curved arms keeps a garden hose off the ground and holds its shape between uses, which matters more than it sounds: a hose left in a heap kinks at the same spots until it splits.
Mount it at a height where the full coil clears your head; a hose loop at eye level is a face-level injury waiting for winter darkness.
Check that the screws hit framing, not just siding; a full hose weighs more than people guess.

High-Quality Metal Bearing Capacity of 300 Lbs:Our power tool organizer wall mount with charging station is constructed from high-quality and heavy-duty metal materials. The industrial metal has undergone extensive load-bearing tests, allowing it to support up to 330 lbs. You no longer need to worry about the shelf breaking or falling off the wall. Our power tool holders can accommodate power tools of any weight.

Power Tool Organizer : This tool storage rack wall mount includes 2 heavy duty shelves, 4 hooks, 1 side bit holder, and built-in 8 AC power outlets. The first layer is equipped with charging station that supports the storage and charging of batteries; the second layer can hold power tools; the third layer can hang 4 cordless drills; the side holder can hang pliers and screwdrivers. The hooks can hang tape measures; the wall-mounted design frees up floor space, solves the problems of tools scattered on the desktop and piled up in corners, and also improves work efficiency

【Integrated 6-Outlet Power Strip】 The power tool organizer features a built-in 6-outlet charging station with a heavy-duty cord, allowing you to charge multiple cordless tool batteries (drills, impact drivers) simultaneously. No more tangled extension cords or searching for available wall sockets in your garage.
9. Overhead Ceiling Storage Racks
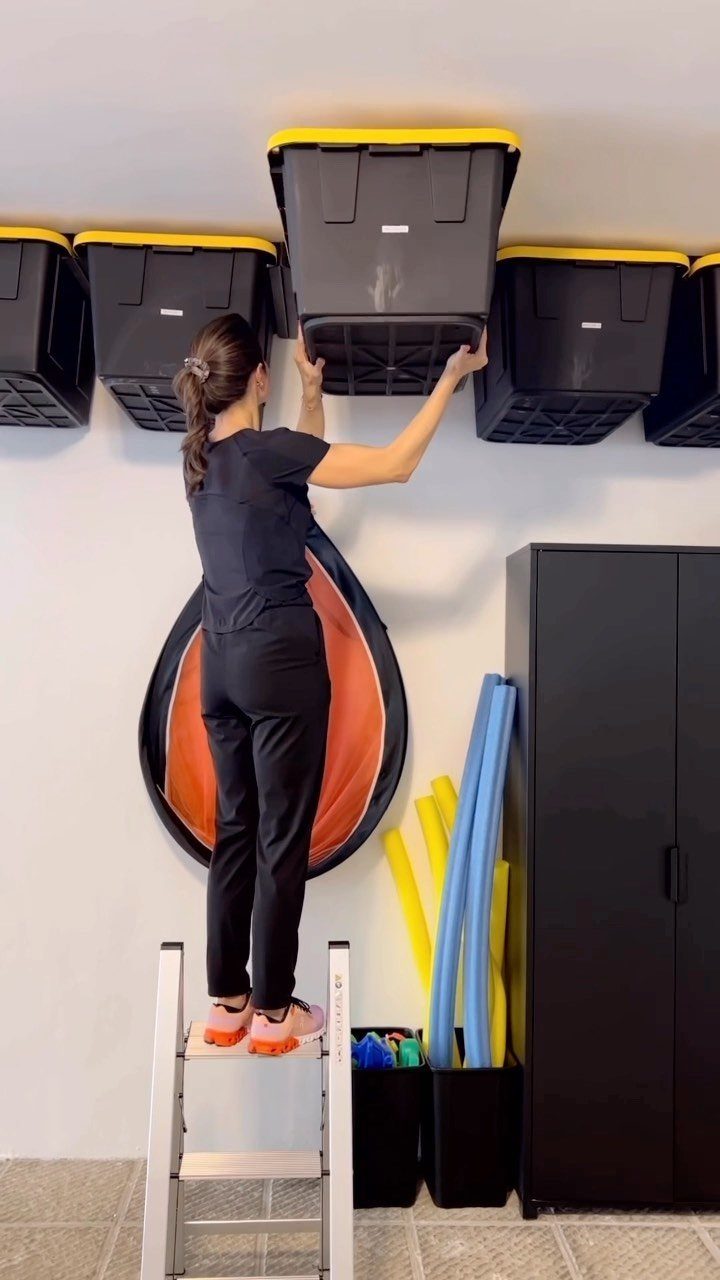
Ceiling racks turn the air above your head into storage for bins you rarely open: holiday decorations, camping gear, the backup set of everything. The system uses rails bolted to joists with bins that slide in from either end.
Before you commit, measure your ceiling height minus the rack depth minus a bin; in a low shed with deep racks, you’re ducking under less clearance than most adults want.
I would not store anything up there that I need monthly, because the ladder step and the lift get old fast.
This works best for seasonal items in sheds with a clear floor center and joists strong enough to take the load; check yours if the building is older.

GET RID OF MESSY TOOLBOX: The magnetic tool holder keep your tools and other metal objects organized and in one place. The magnetic bar takes very little space, and using it will help you get rid of messy toolbox, easily hold your wrenches, screwdrivers, spanners and keep them organized.
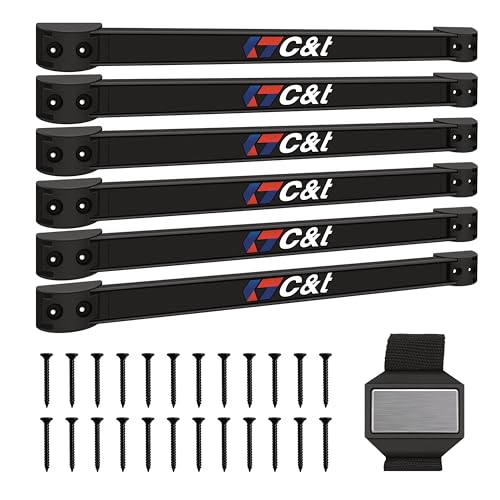
【Package Include】Magnetic Storage Organizer Tool Holder Set Include 6-Pack Magnetic Tool Bar,1-Pack Wrist Magnetic Holder.

Powerful Magnetic Strength: Heavy-duty magnetic strips securely hold hammers, screwdrivers, pliers, wrenches, sockets and other metal tools, keeping them organized and within easy reach. A single magnetic strip holder can hold up to 22 lbs
10. Freestanding Wooden Garden Tool Organizer
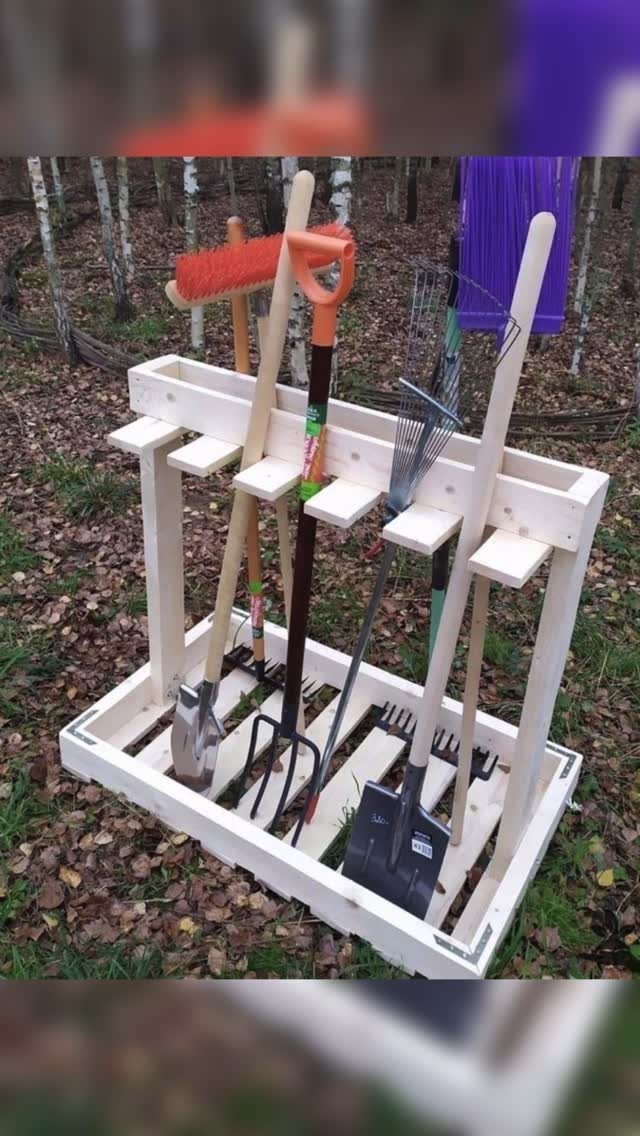
A freestanding rack built from common lumber lets you park tools anywhere the ground is flat: driveway, garden edge, the narrow strip between shed and fence where nothing else fits.
The slots are cut wide at the top and narrow below, so handles drop in and stay upright without clamps or catches.
I would use ground-contact pressure-treated 4x4s for the uprights and 2x4s for the crosspieces, with exterior screws, not nails; the seasonal wet-dry cycle works nails loose fast.
This takes floor space no matter how slim, so it suits open areas more than crowded sheds. Move it inside before hard frost if you want the wood to last.

DIY INSTALLATION: Our heavy-duty garage shelving can be easily installed in various configurations to suit your specific space requirements, providing you with versatile storage solutions. You have the flexibility to choose whether the baskets are interlocked or separate, and whether they hang on the shelf or the storage frame. Whether you need storage in your garage, workshop, yard, or garden, our DIY installation offers the ideal solution to meet your needs.

Adjustable and Removable Bins Are Color Coded for Easy Organization of Parts and Tools
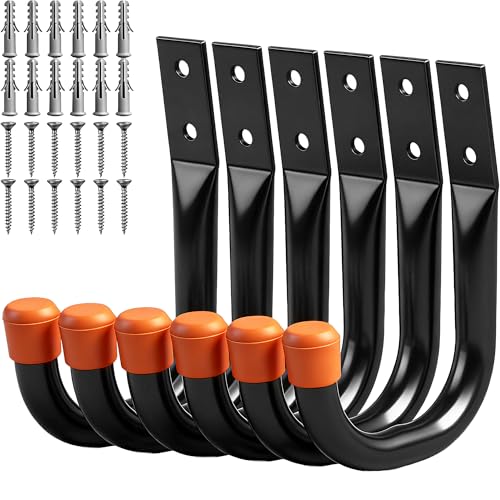
Comes with 6 heavy-duty wall hooks, 12 wall anchors, and 12 screws. HORUSDY delivers reliable quality and dependable support to make your garage organization easier and more efficient.
Importance of Organization
An organized shed saves time because you stop hunting for the tool you need and start using it.
That protection goes both ways: proper storage keeps edges sharp and surfaces rust-free, while keeping heavy and sharp items in fixed spots cuts the chance of injury. Vertical space is the asset most people leave on the table.
Even a small footprint holds more than it looks like it should when you use walls and ceiling instead of spreading outward. The satisfaction is real, though I would not call it the main reason to bother.
A shed that stays tidy does so because the system fits what you actually own and how you actually work, not because you bought the right bins once.
If you’ve ever tried to keep a garage, shed, basement, or storage unit in order, you probably know how quickly those spaces can spiral into utter chaos.
Maintenance Tips
Reset the shed every few months by walking everything back to its designated spot.
The small time investment prevents the slow drift that turns order back into piles. Once a year, strip the space to bare walls and concrete.
I sort shed contents into 3 piles: keep, move on, and trash. The one-year test works for most items, though I make room for holiday decorations and camping gear that only see action a few weeks a year.
Clean before you reload, because dust and moisture hide under stored items and accelerate wear. Wall, door, and ceiling storage should leave no flat surface where clutter can settle.
If the system buckles, the problem is usually volume, not method. Something that has not earned its place needs to leave.
What Not to Store
Do not store anything in an unconditioned shed that heat, freeze, or moisture will ruin.
Paint and finishes split or skin; canned food and pet food spoil and draw rodents; electronics warp or mold in humidity; loose papers curl and go illegible. Propane belongs outside entirely.
A shed in July can hit 120°F inside, and in January the same space drops below freezing; that swing rules out a lot of what people try to store there. Metal sheds amplify the swing.
If you need the item to last or it has any value beyond replacement cost, keep it in conditioned space. The shed is for tools, equipment, and goods that tolerate the cycle.
Frequently Asked Questions
How do you organize a small shed?
Use vertical space first.
Walls and ceiling do the heavy lifting so the floor stays clear for the mower and wheelbarrow. The goal is a near-empty floor that still lets you move and store large gear.
How do you declutter a messy shed?
Strip it to bare concrete and exposed framing first.
Sweep, hose, and let the concrete dry completely before anything returns. The moisture stains and dust you find tell you where the old system was failing.
